December 9, 2015Comments are off for this post.

Early Planing and Reading Wind

The Writing is on the Water

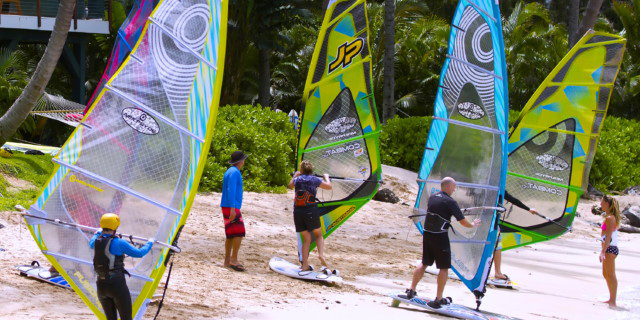
Early planing skills requires the ability to:

1. Correctly read the speed of wind on the surface of water.
2. Radically change the direction of our board in relation to the wind.
3. Commit 100% to the harness lines.
4. Readily adjust our stance when needed.

Correctly Reading the Wind

Reading the patterns of wind as it sweeps across the surface of water is one of the most undervalued ‘core skill’ in windsurfing. If we cannot read the “writing on the wall,” in our case ‘on the surface of water,’ then there is no way to preempt or prepare the correct stance for the angles or strengths of wind coming our way.

All our acquired stance skills and understandings of board direction in harmony with wind angles become obsolete if we are not able to read the wind. We must be able implement the correct use of our body’s weight to counteract the power in the sail or lack of power at the correct moments. This can only be achieved with highly tuned wind awareness.

If we are out of sync with the wind, we will constantly tread on the winds toes, like classic bad dance partners.

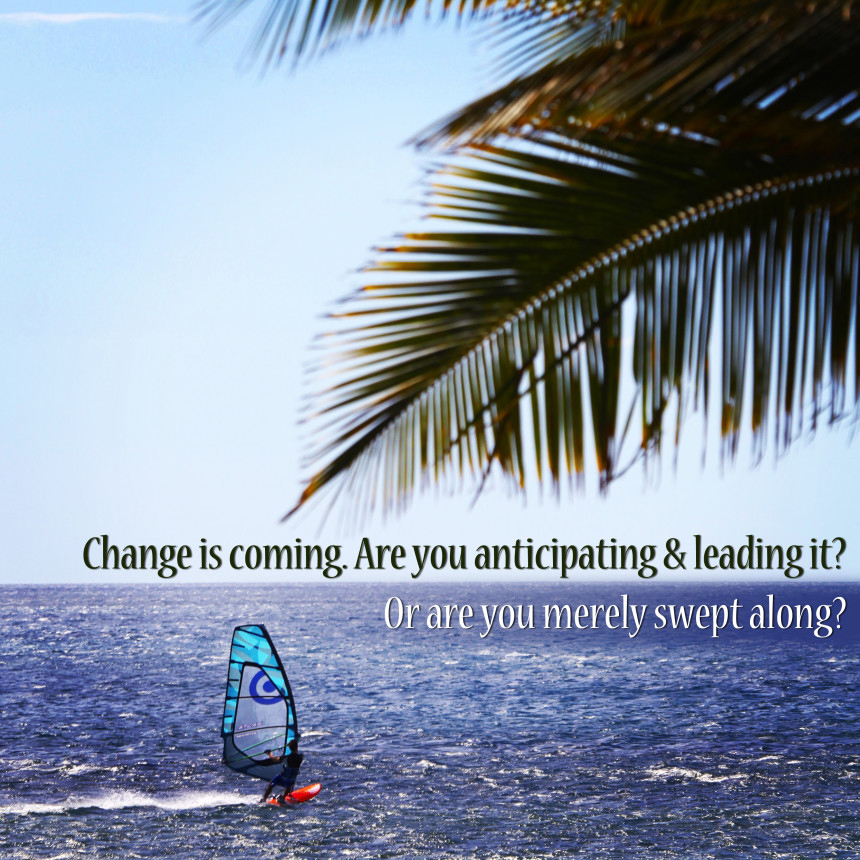
The Wind Leads. We Follow. Not the other way around.

Just like learning to read. We need to first look at the letters to become familiar with their shapes before relating a sound to them. We cannot learn to read if we never look at the letters on the page. Same with reading the wind. We cannot learn to read the wind if we never look upwind to see the patterns different wind strengths make on the water as it comes towards us.

Some say they feel it- But probably just a little too late. If a gust hits us while we are still in a upright stance we will be over the handle bars in a second or falling off backwards if we did not anticipate a lull. We’ll maybe even come in and complain that we keep coming off the plane, that there is not enough wind and or it’s too gusty-

Reading wind

We read the chicken scratch surface texture the wind makes on water not the bigger choppy waves. Flat water is easier to read for this reason.

One day when you are resting at the beach. Try and stare at the water more and see if you can spot the lulls and gust.

Gusts

A gust looks like the wind has taken a file to surface of water and roughly scratched it. The more wind the more roughly filed the surface of water looks- If it’s sunny the ‘sparkles’ are more close together like the photo below. Can you spot the patch of unruffled water surface that indicates a strip of almost no wind- Literally a burst of no wind (lull) in an otherwise very windy patch of water?

Lulls

The surface of water looks more polished and if it’s sunny the sparkles on the water are not as close together like photos below:

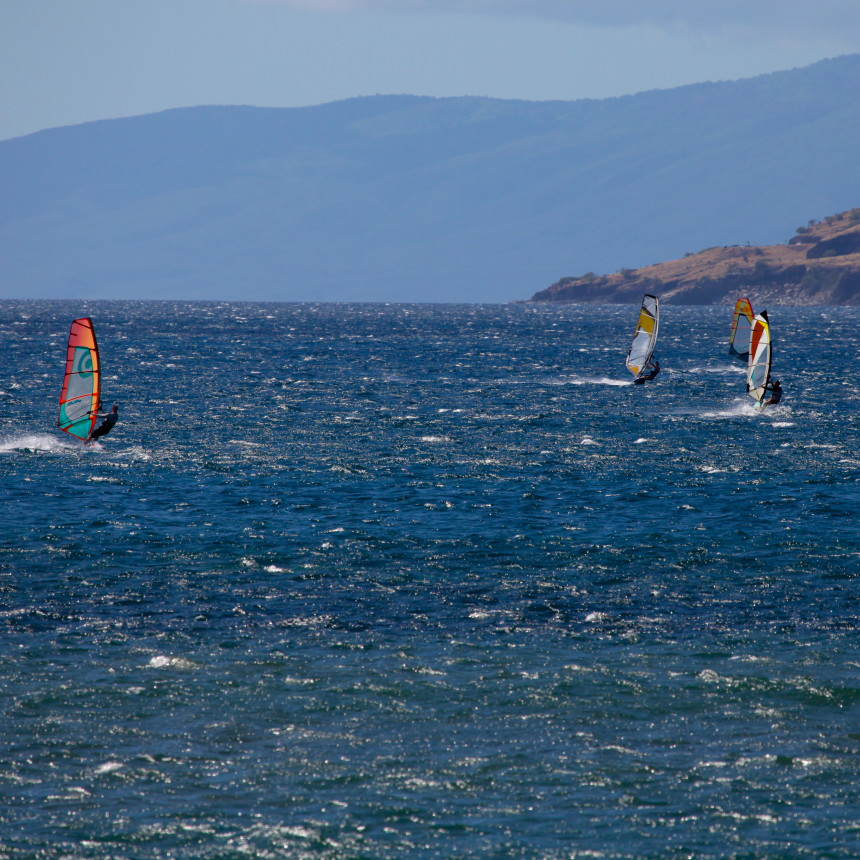
What is the wind doing in this photo below?

1. Wind is coming from the right
2. Loose scatter of sparkles mean there’s light wind close to shore.
3. Close together sparkles mean there’s higher wind on the outside.
4.  Which mean it’s probably blowing cross offshore.
5. Wind coming from off the land is probably more gusty- So we will have to pay more attention to the wind while we are sailing in order to plane through the lulls and hunker down in our harness for the gusts.
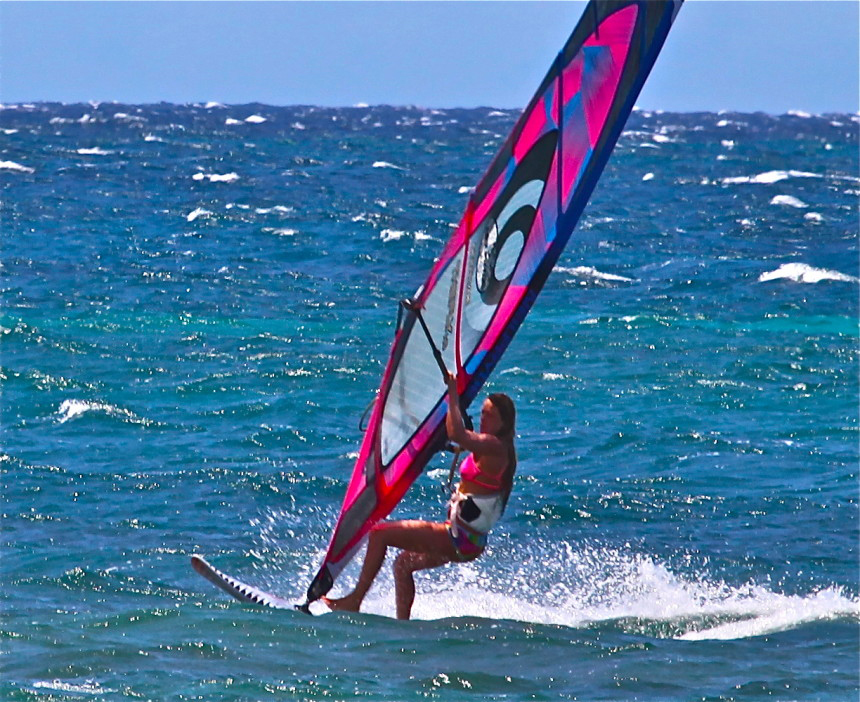
Board Angles

Once reading the wind has been mastered, we can think about radically changing the direction of our board in relation to the wind.

-----------------------------------

Angles of the board in relation to the wind:

-----------------------------------

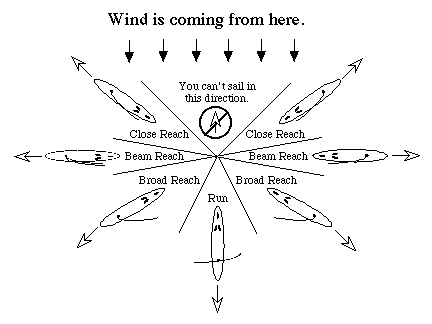
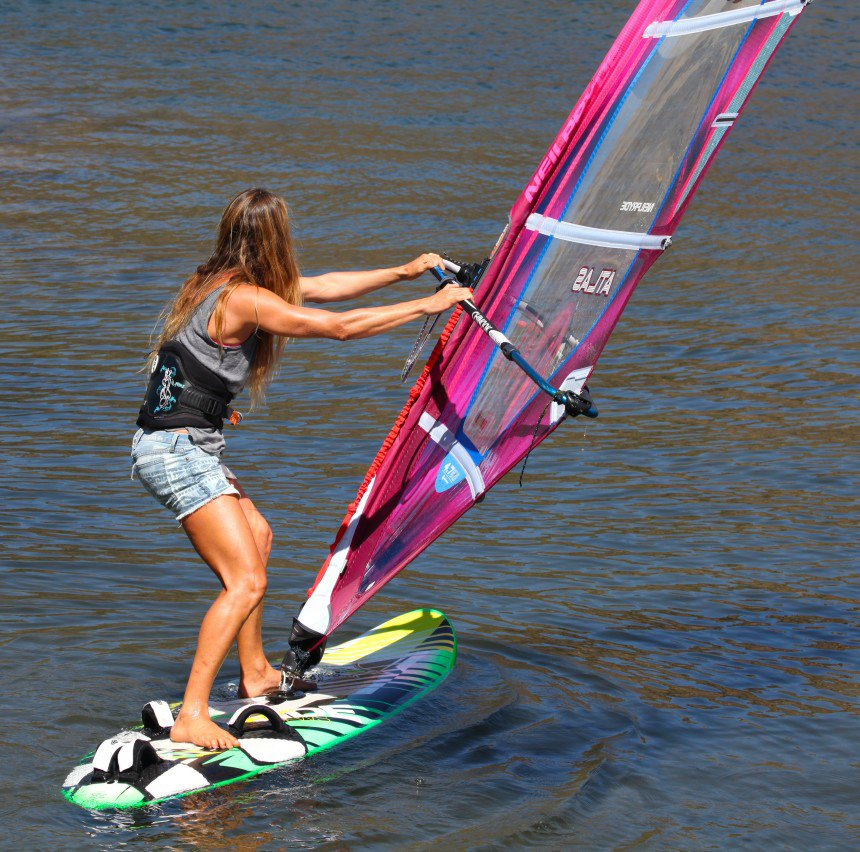
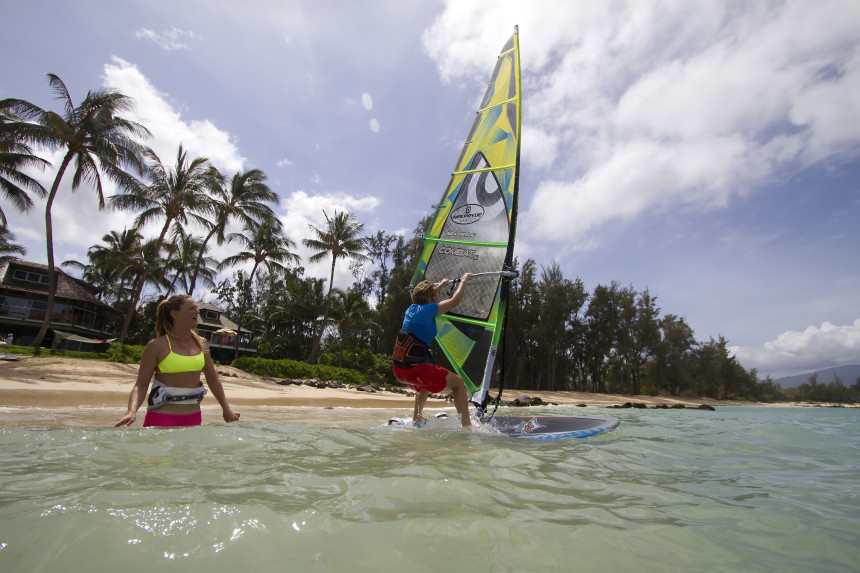
Especially on light wind days: Head upwind when we are not planing and when we first launch from any beach, hook in and Close Reach until we find a gust strong enough to use for planing or until we hit the wind line. Heading upwind in light winds is more stable than bearing off due to the way apparent wind works.

If we are not planing do not just drift down wind. Get into our light wind upwind stance and keep on a close reach.


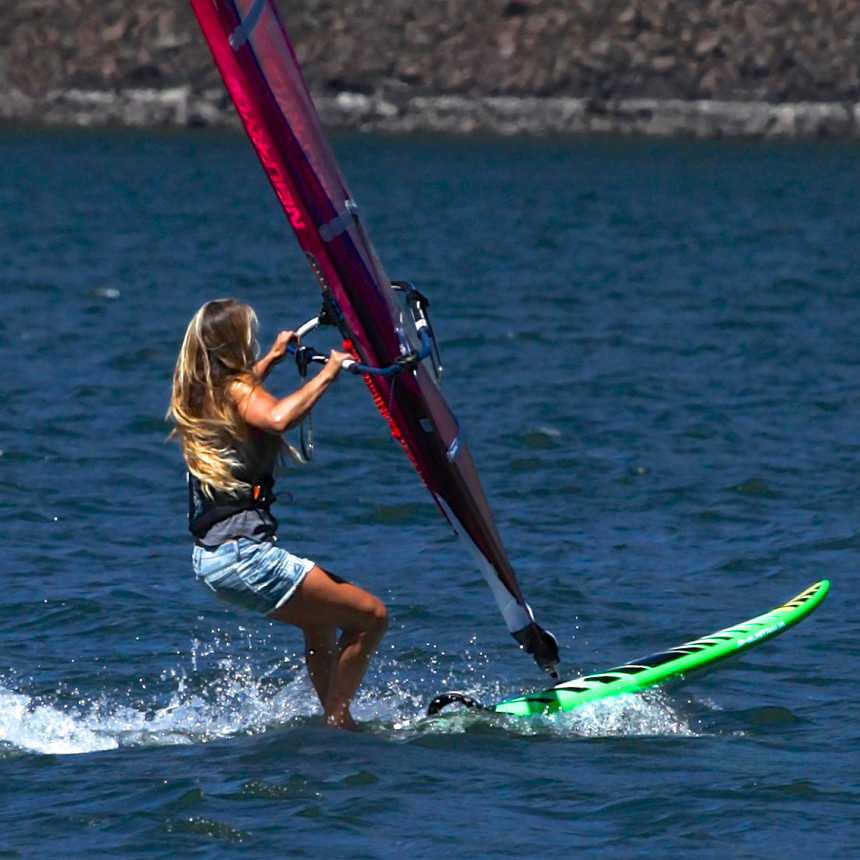
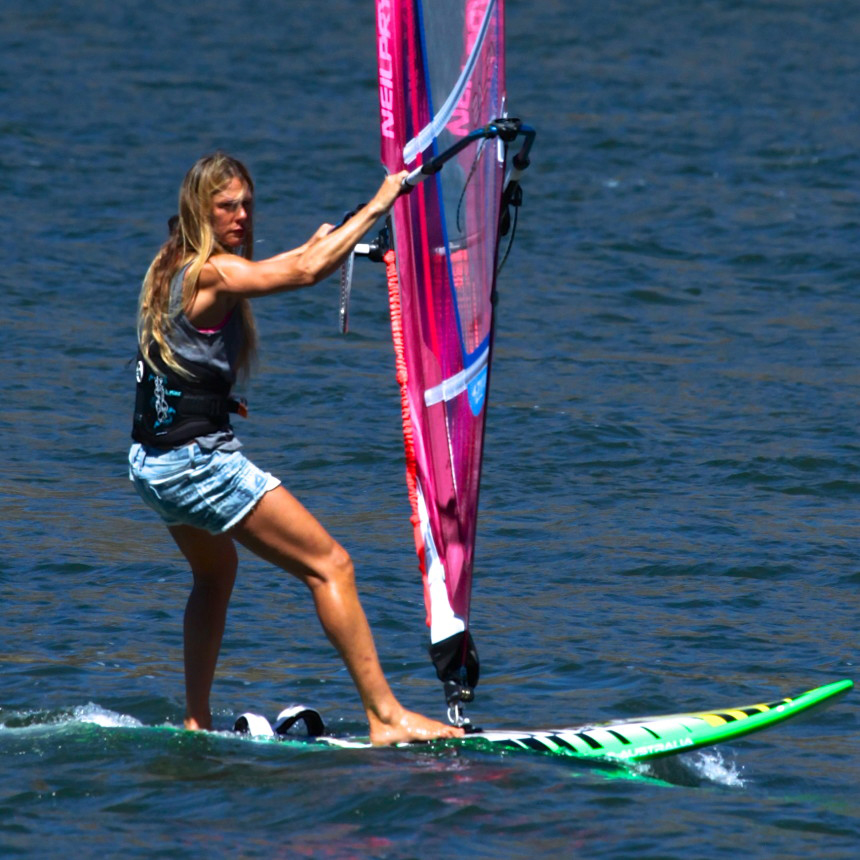
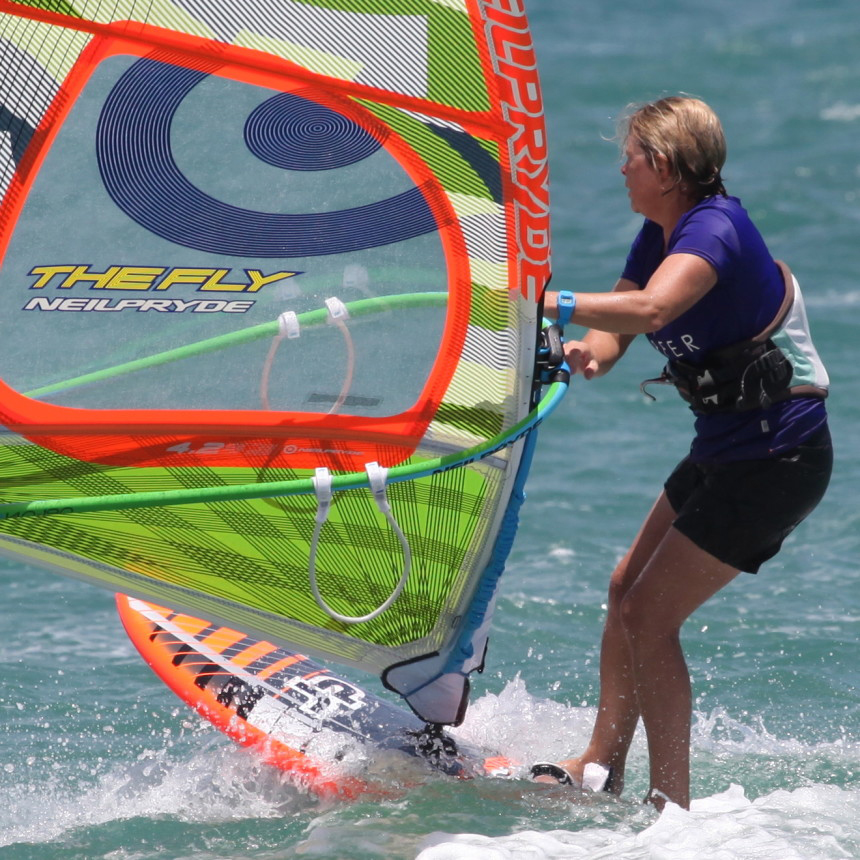
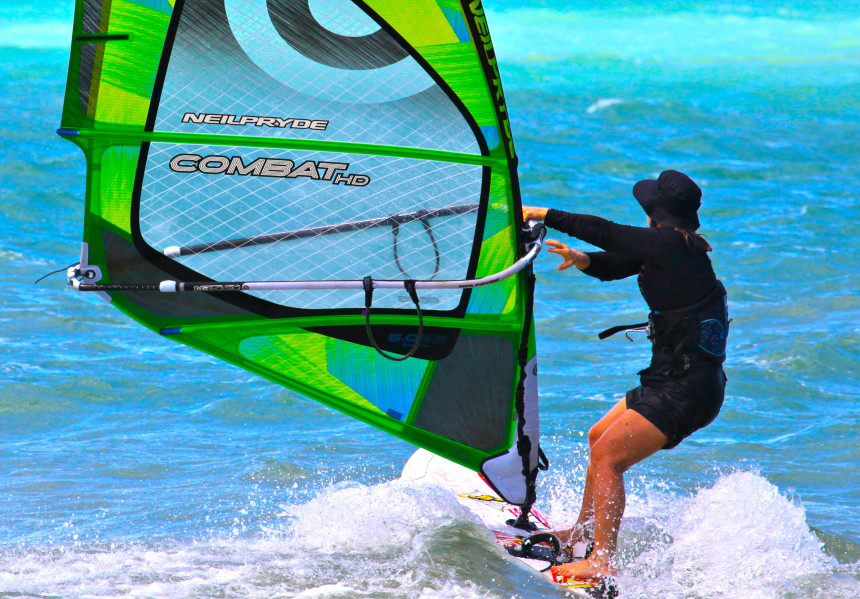
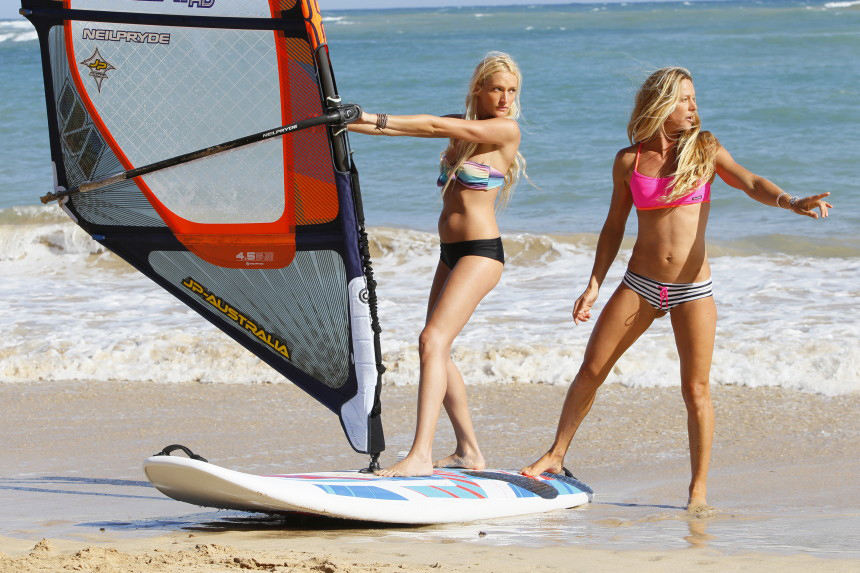
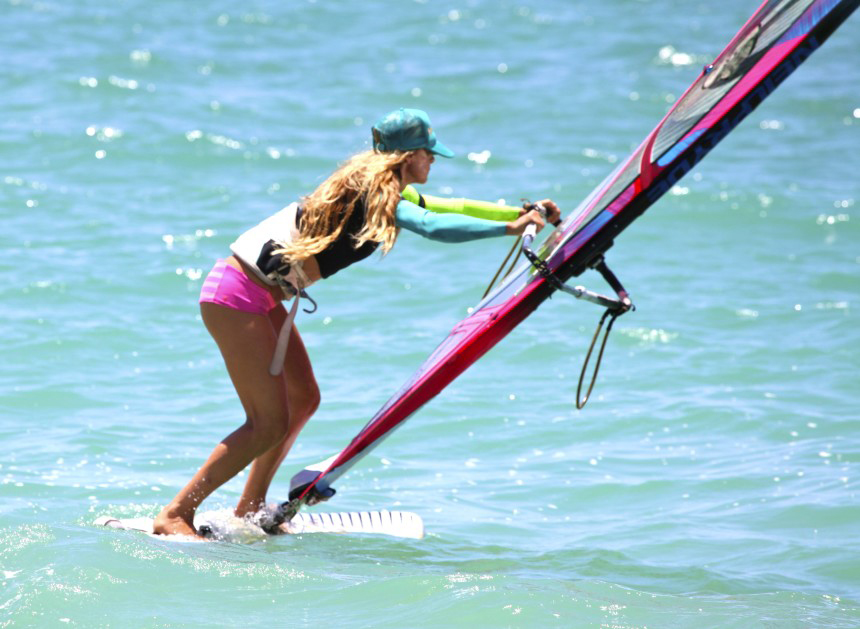
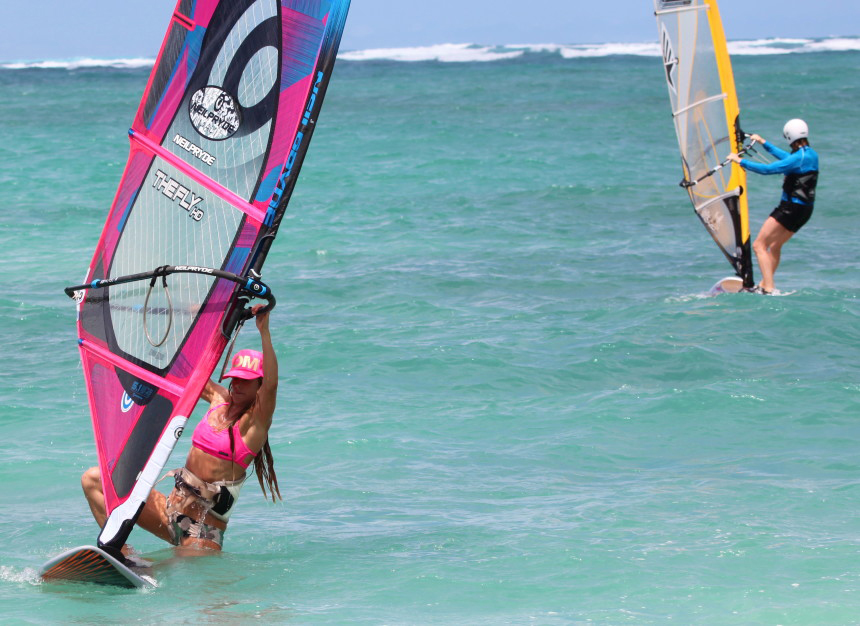
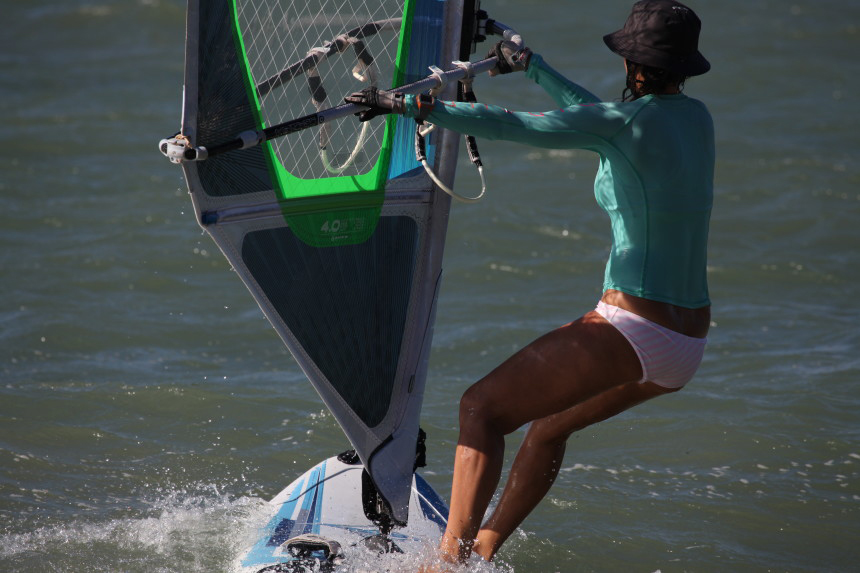
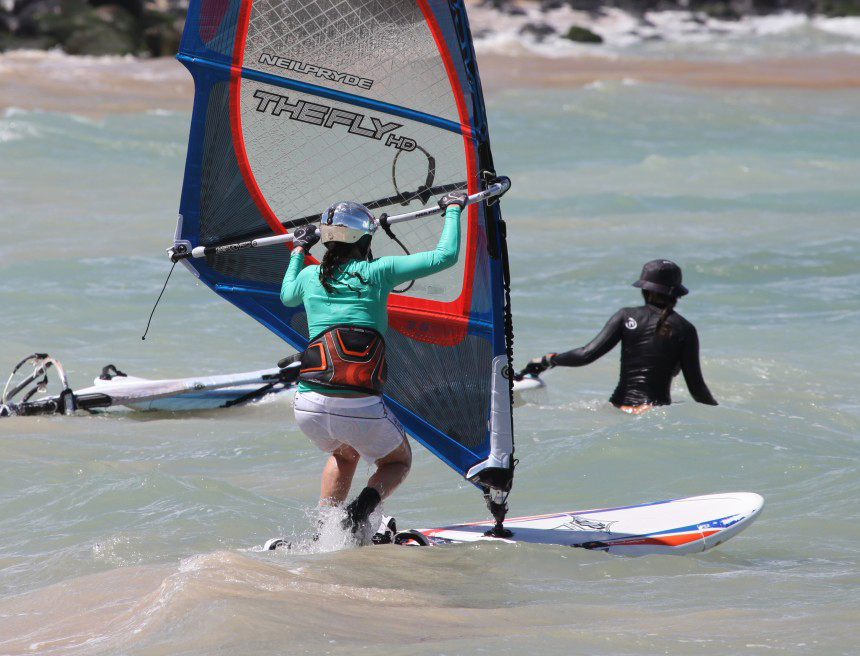
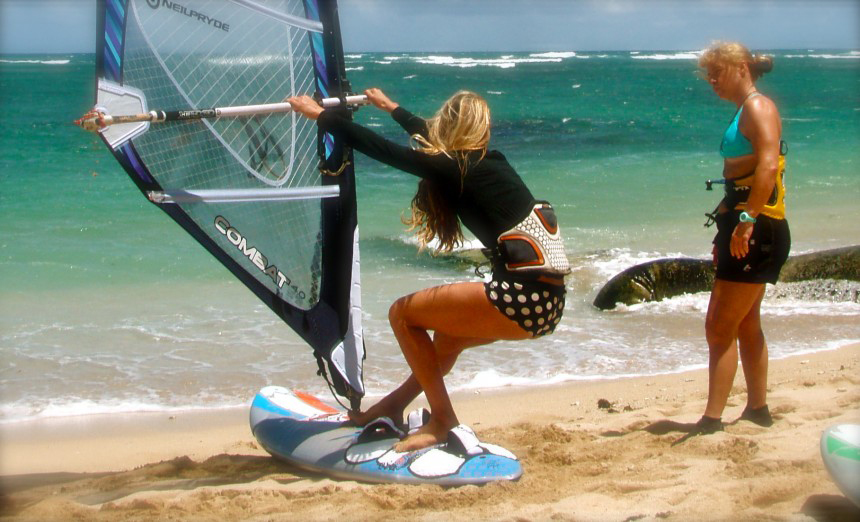
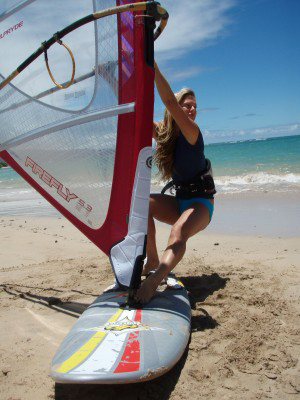
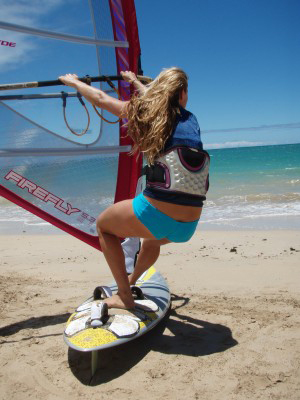
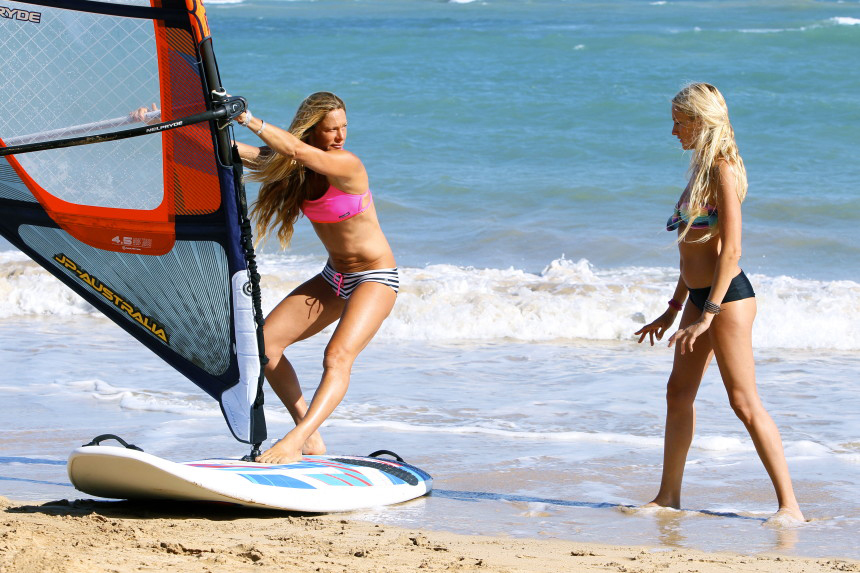
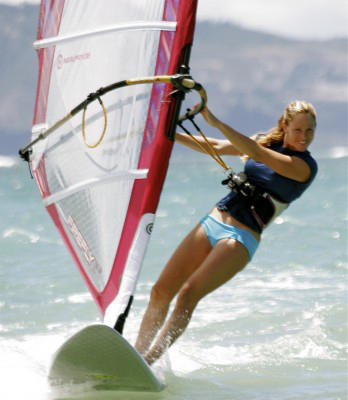
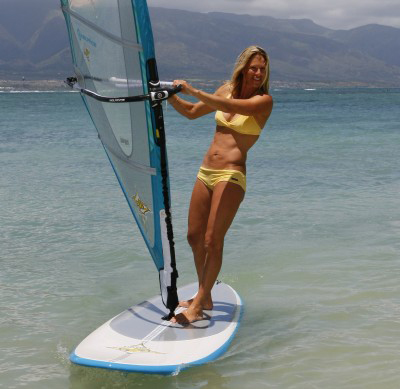
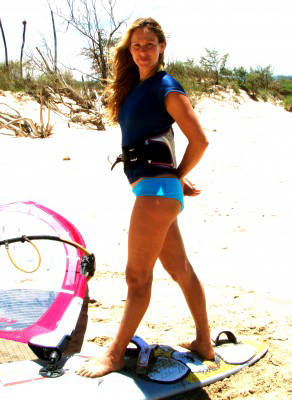
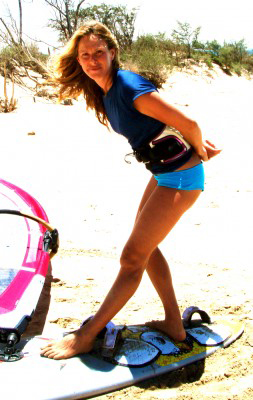
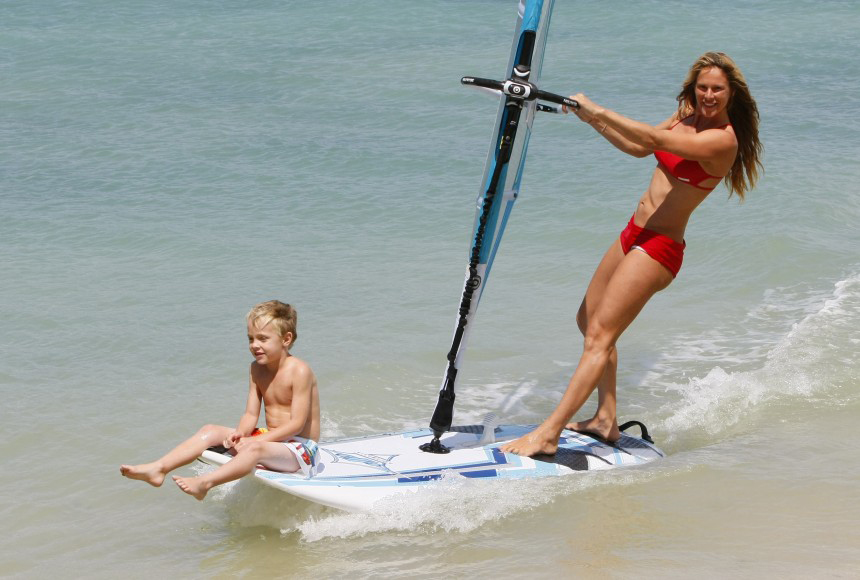
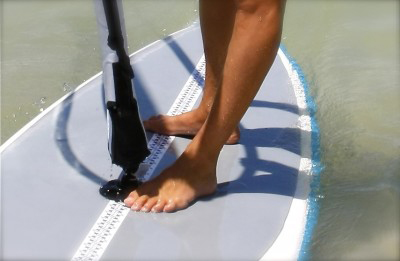
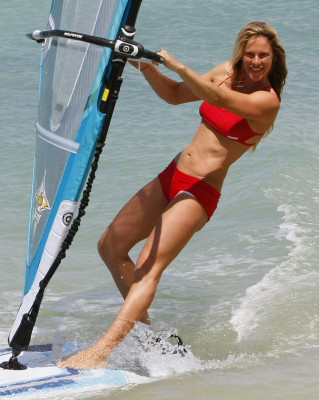
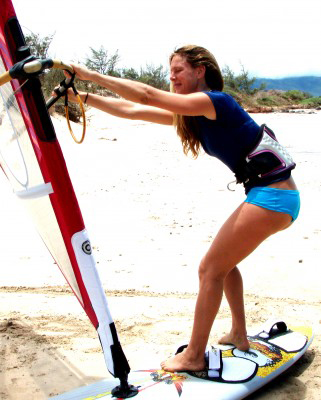
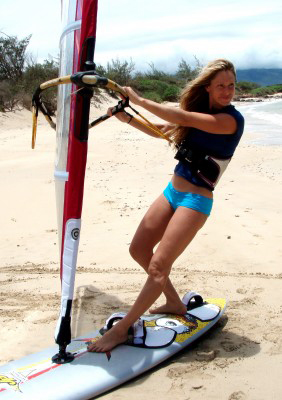
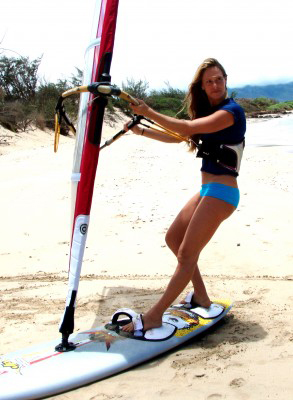
Light Wind Upwind Stance

Front foot up beside the mast foot. If we are hooked in the weight is in the harness not the arms.

If we are not hooked in make sure we have space between our body and and the rig. Do not pull sail in with bent arms. Especially in super light wind situations when we are trying to get out to a wind line.

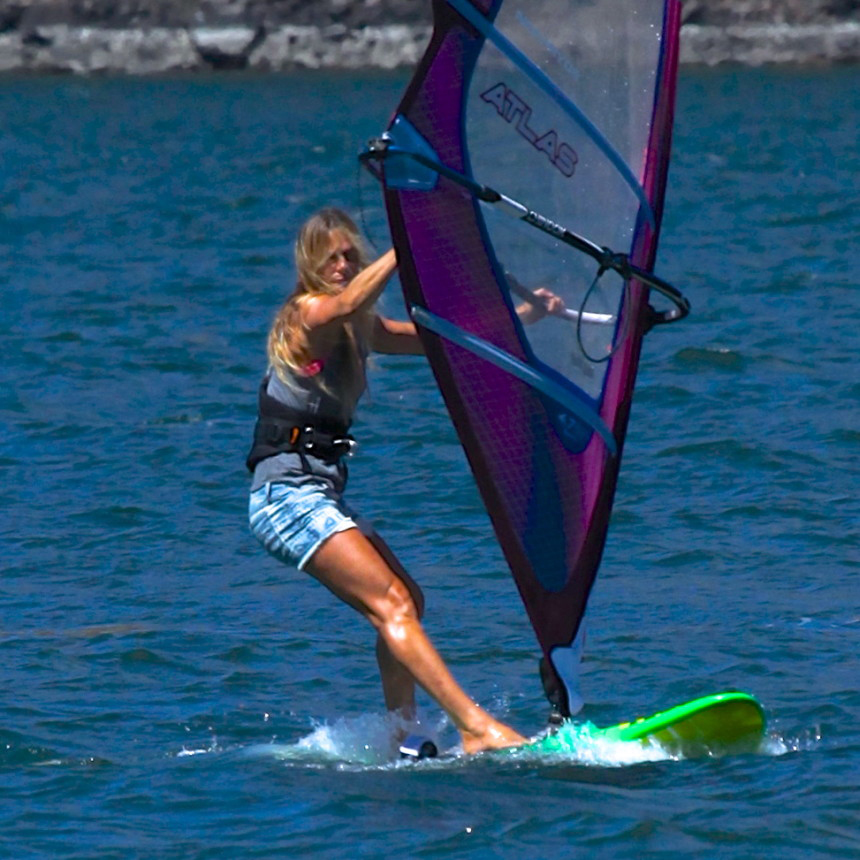
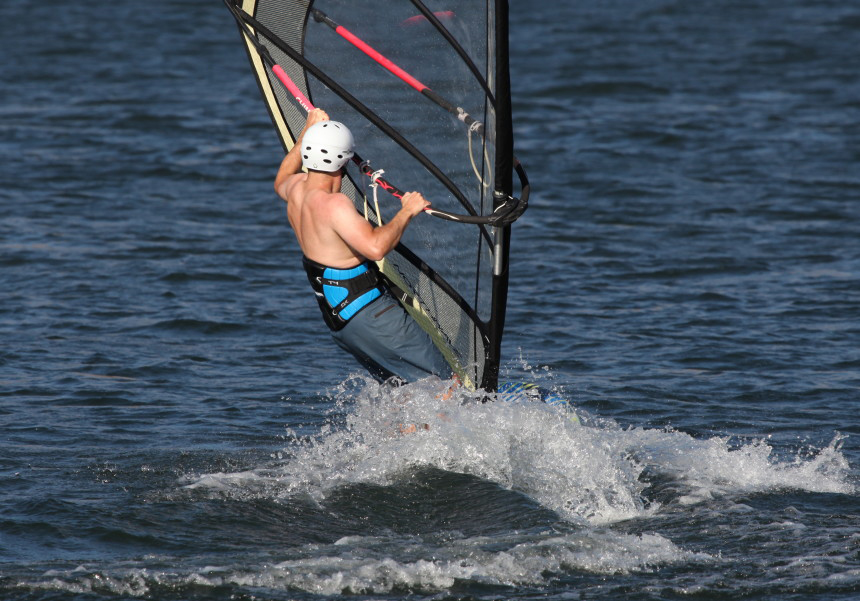
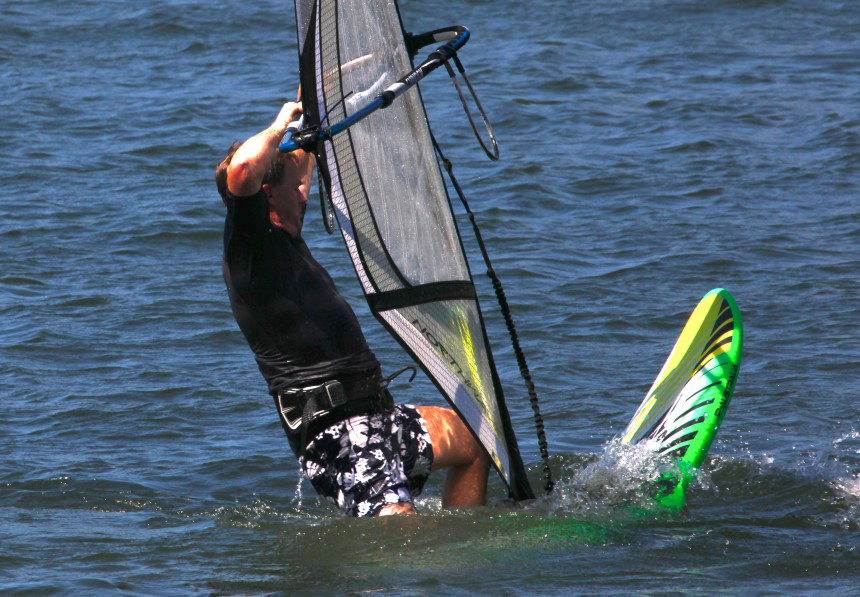
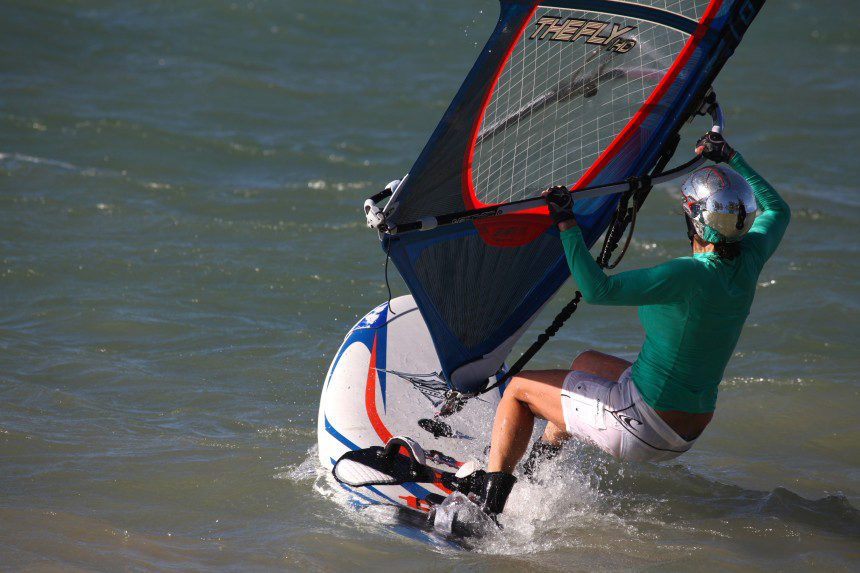
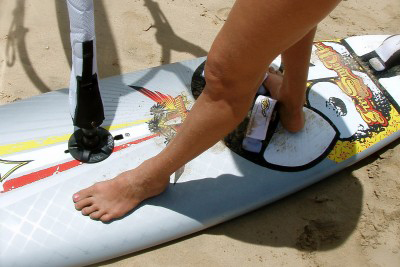
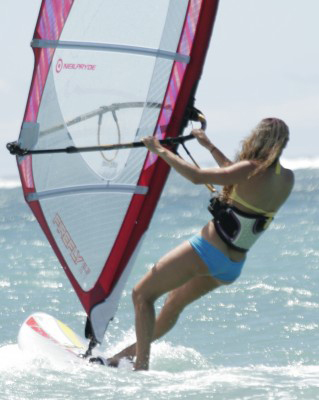
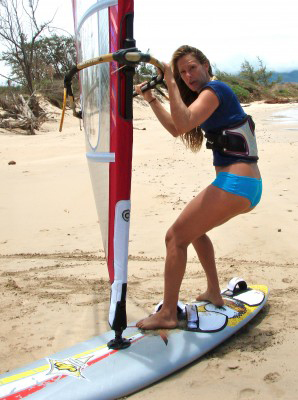
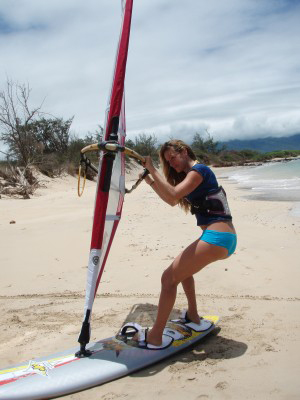
When we feel like it’s windy enough to get going, hook in if we weren’t already. Pull the board under our bum with our back foot and push through the balls of our front foot to scissor the board on to a Broad Reach maybe even touching onto a Run Reach. Make sure we sink more into our harness so we don’t get catapulted with the sudden power in the sail.

FYI: If we suddenly yank on our back hand- Releasing the tension of our body weight in the harness lines we will stall our efforts as we ruin mast foot pressure connection and sink the back of the board. It just takes a slight sinking of the tail to stall out.

If we do not get going with the burst of sudden change in the boards direction and we haven’t interrupted the flow of action with unnecessarily pulling the rig over the back of the board with our arms – then it’s not windy enough yet or we haven’t reached the wind line. Stop and head back upwind. Staying upwind is the biggest challenge of light wind days so let’s not lose unnecessary ground.
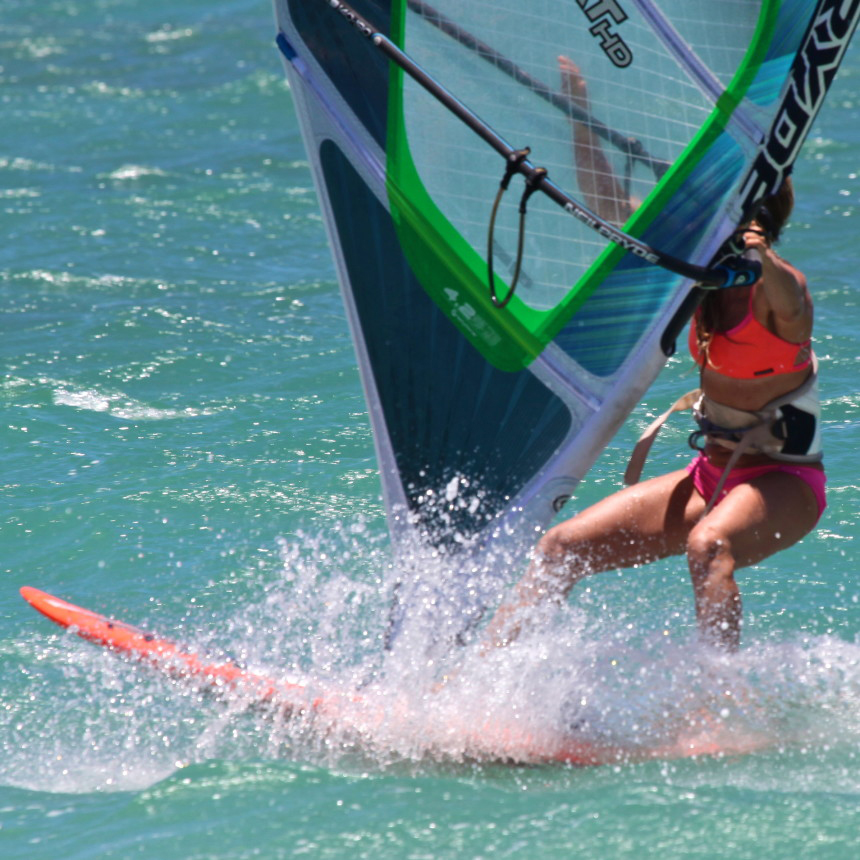
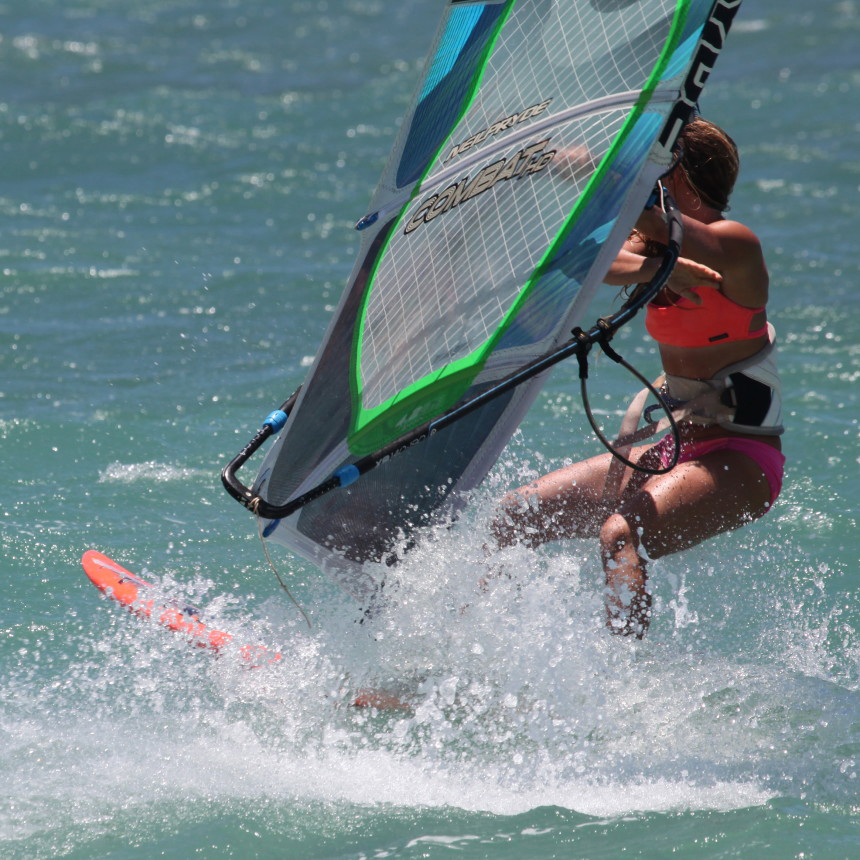
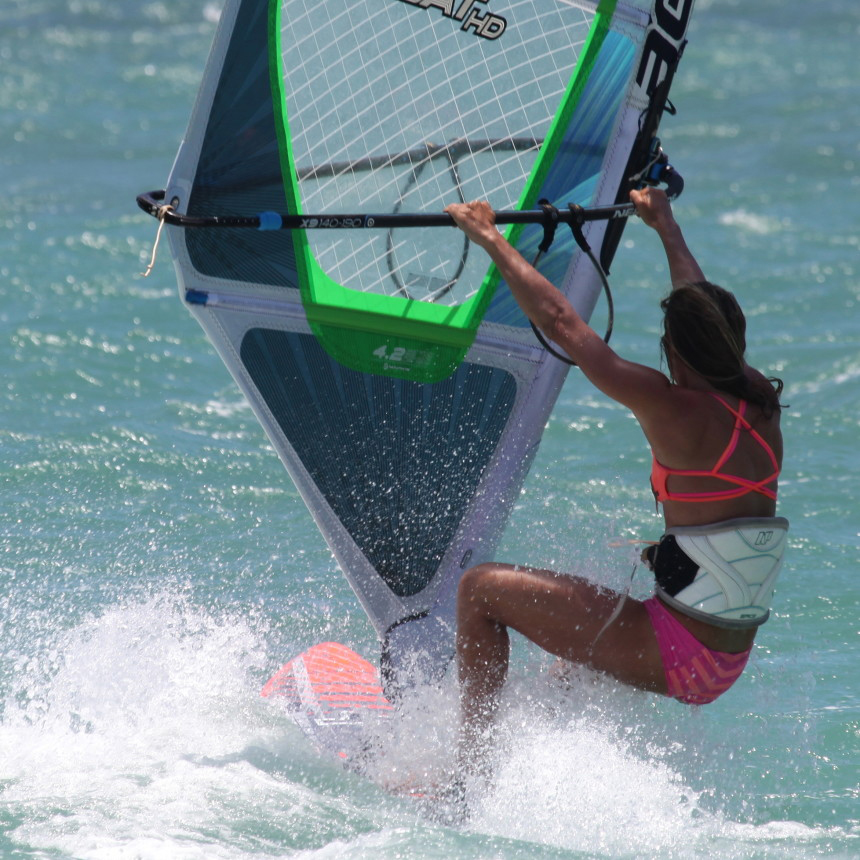
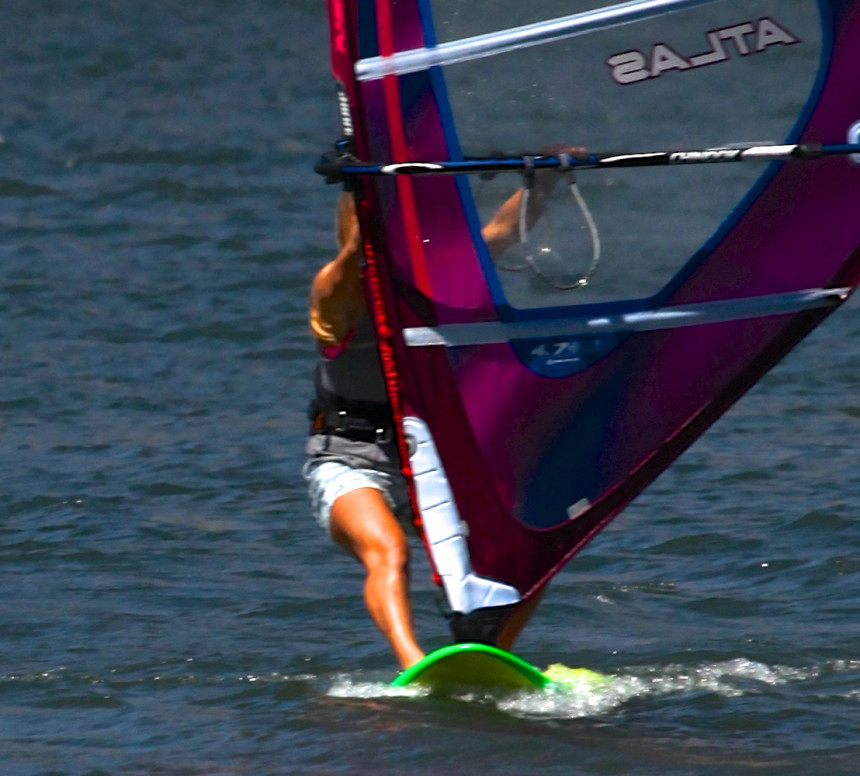
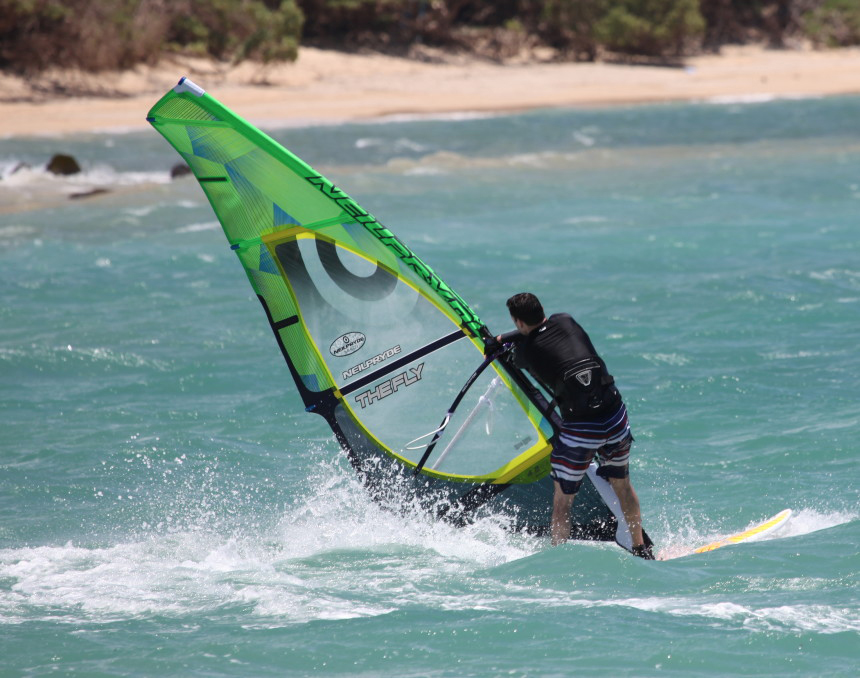
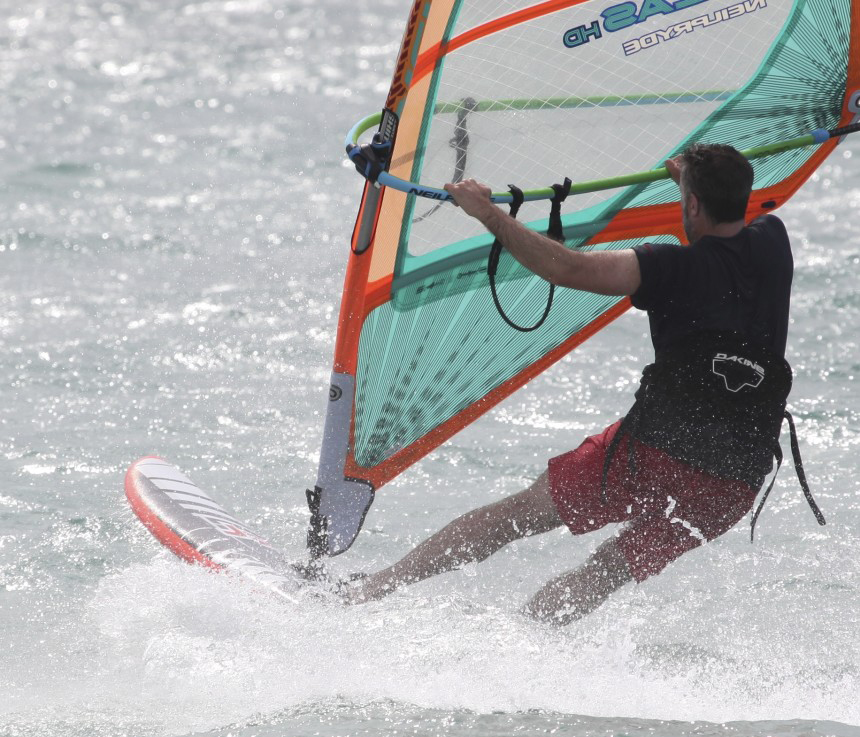
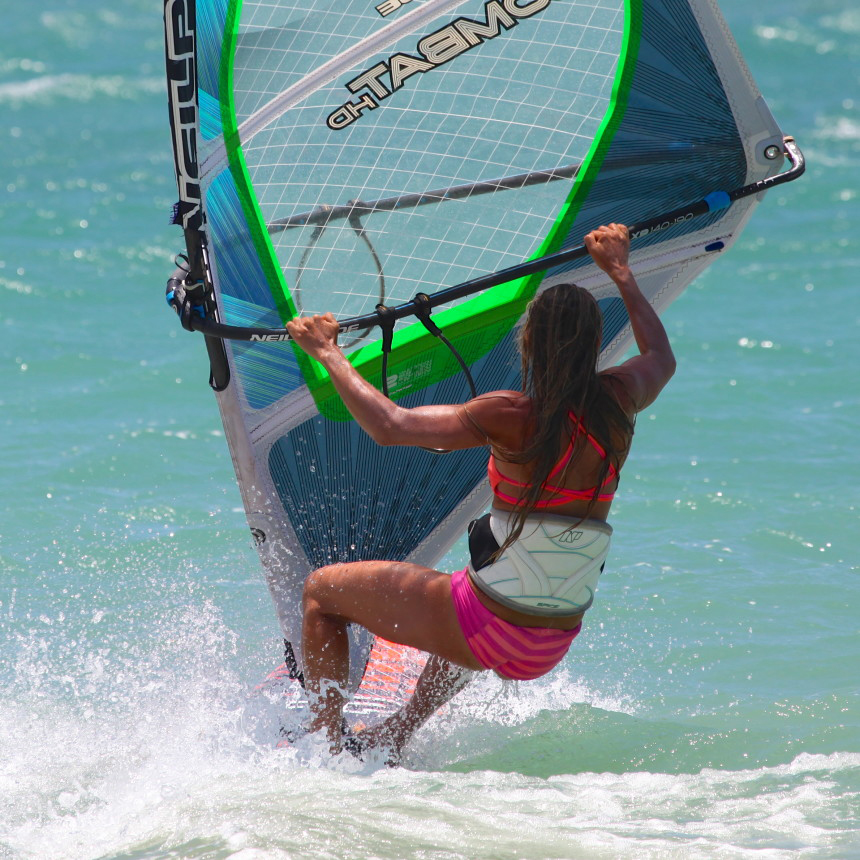
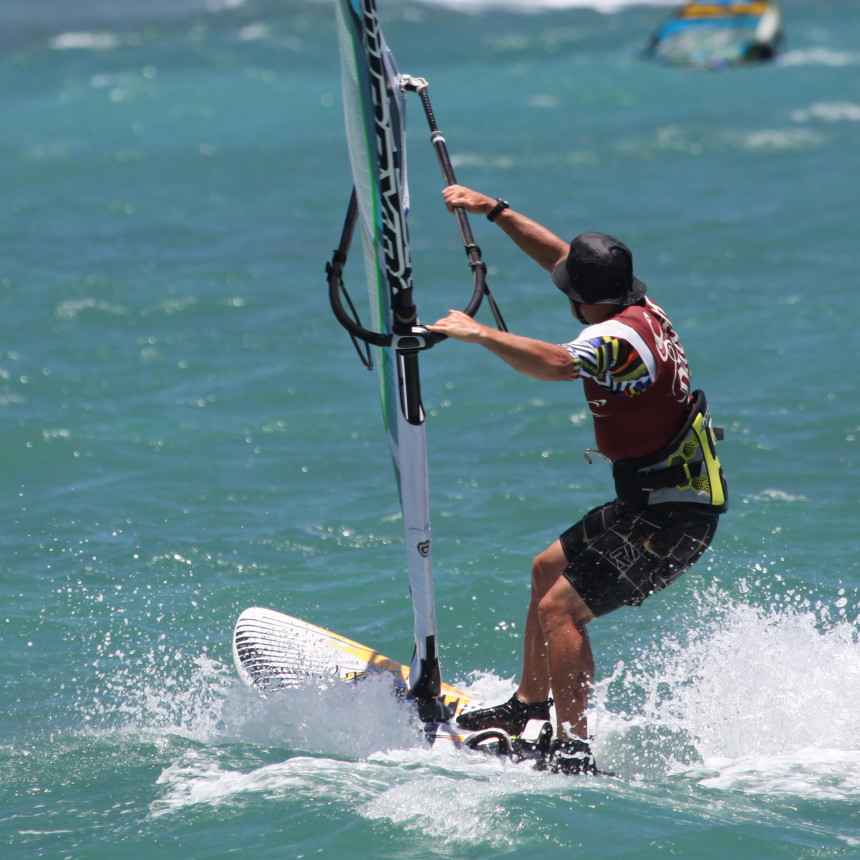
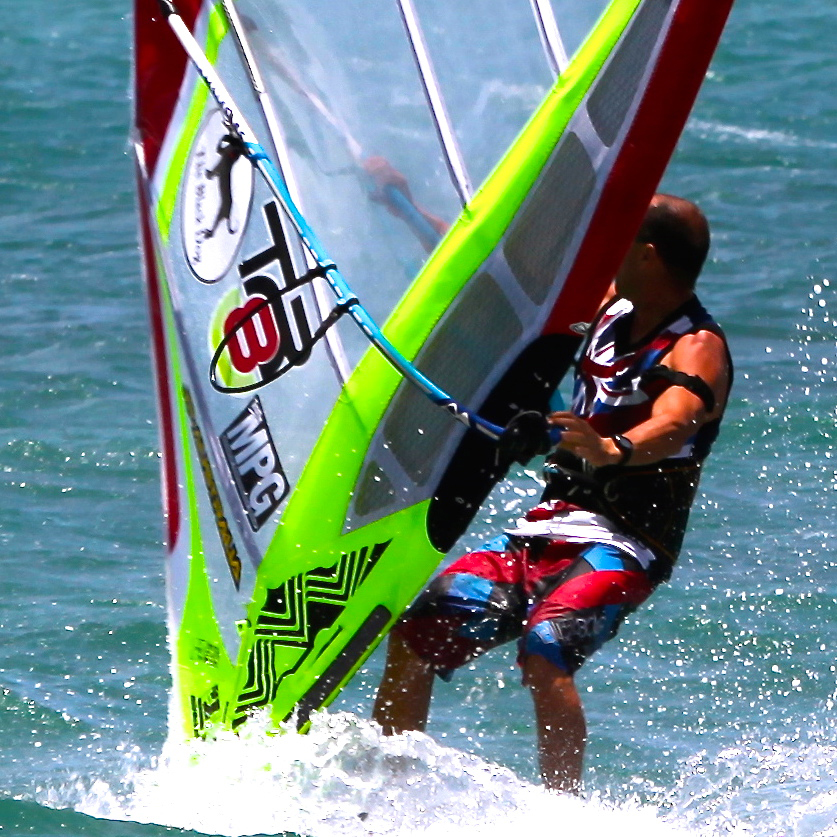
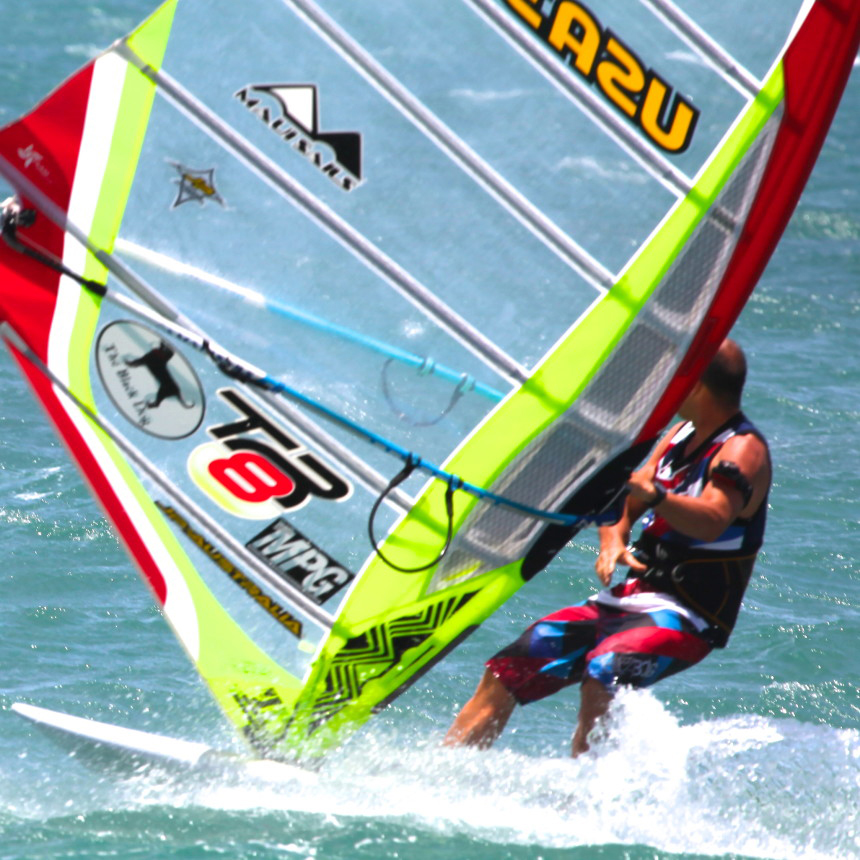
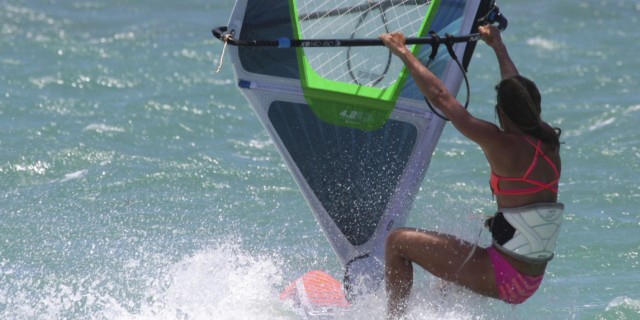
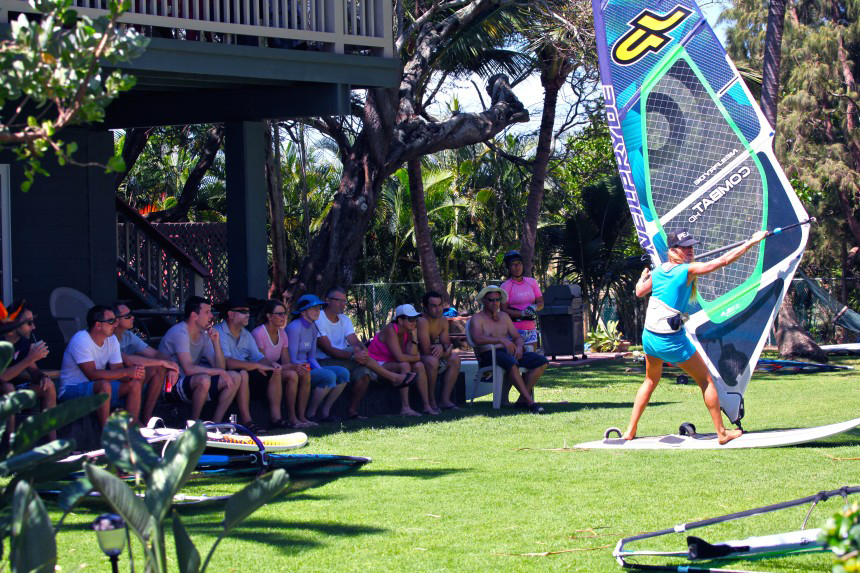
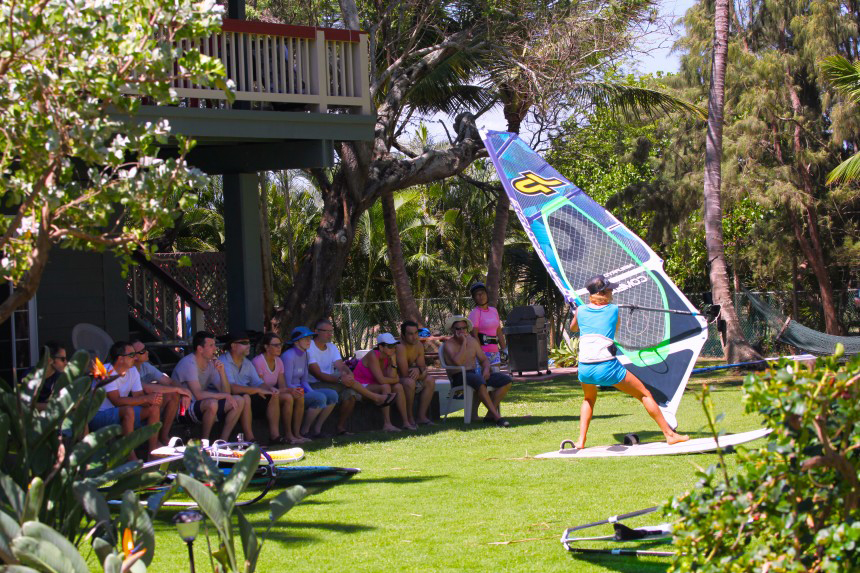
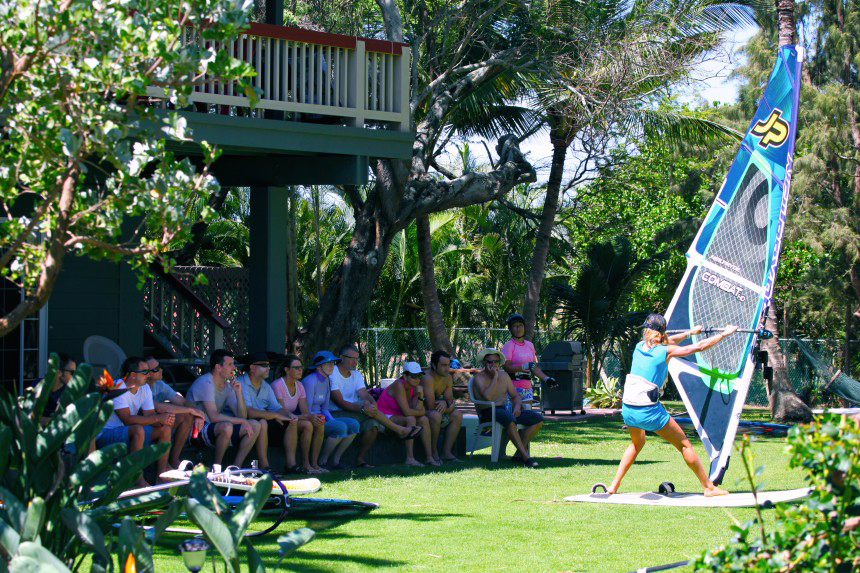
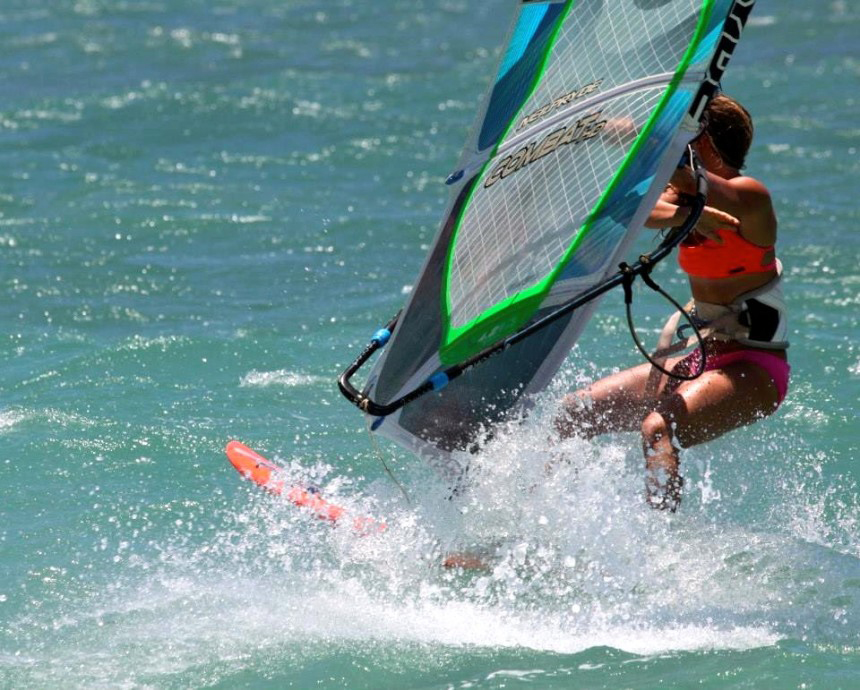
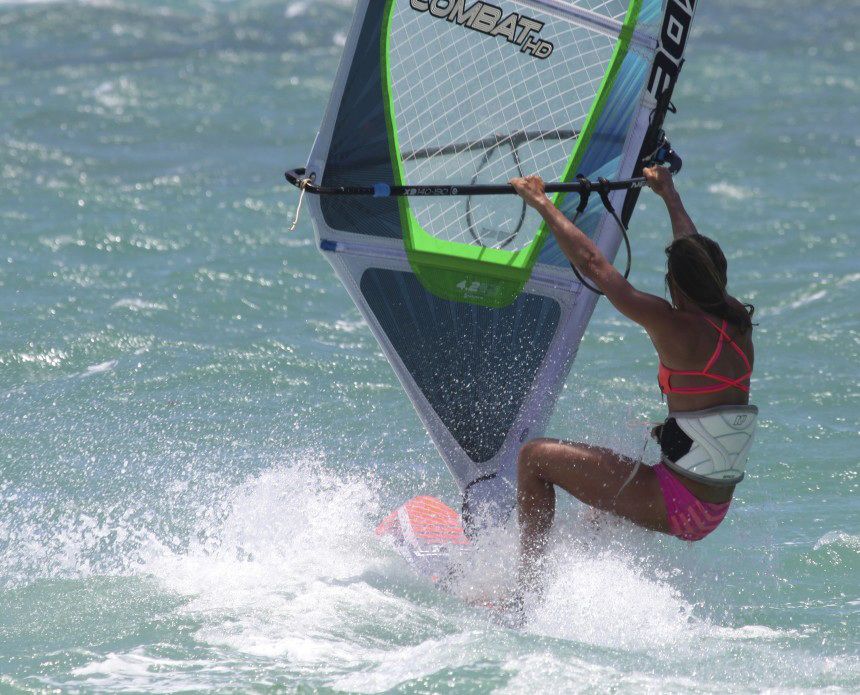
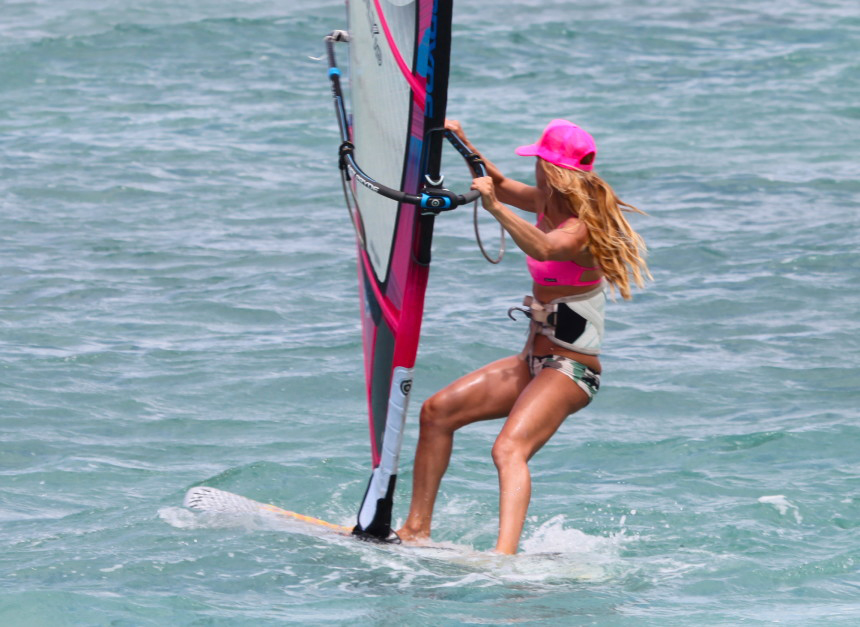
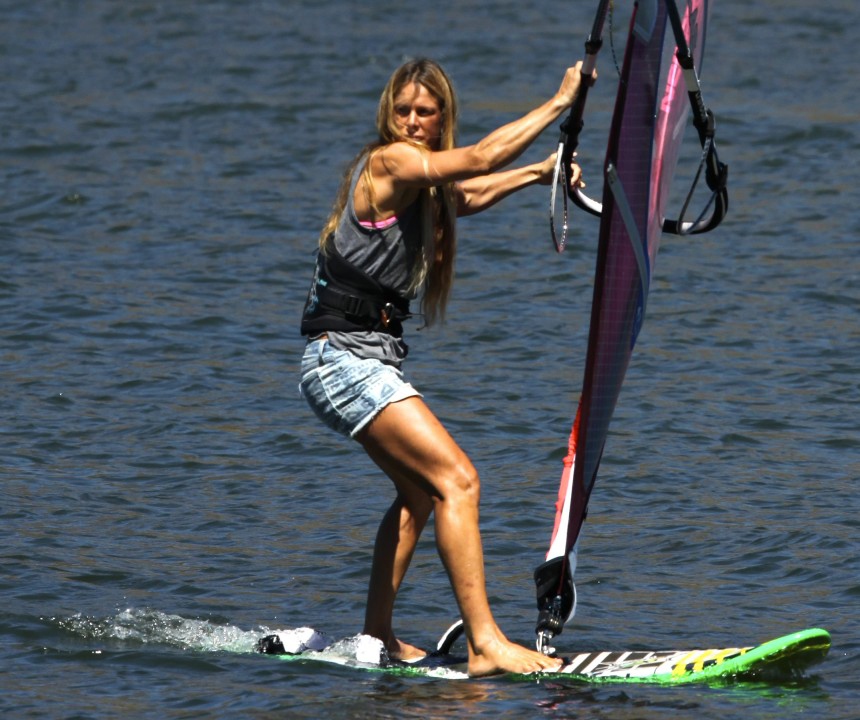
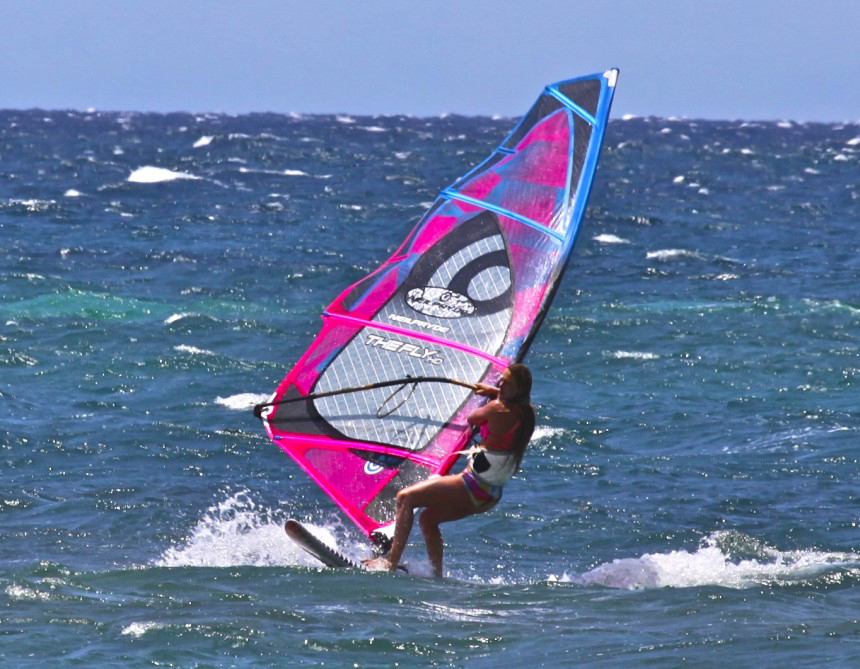
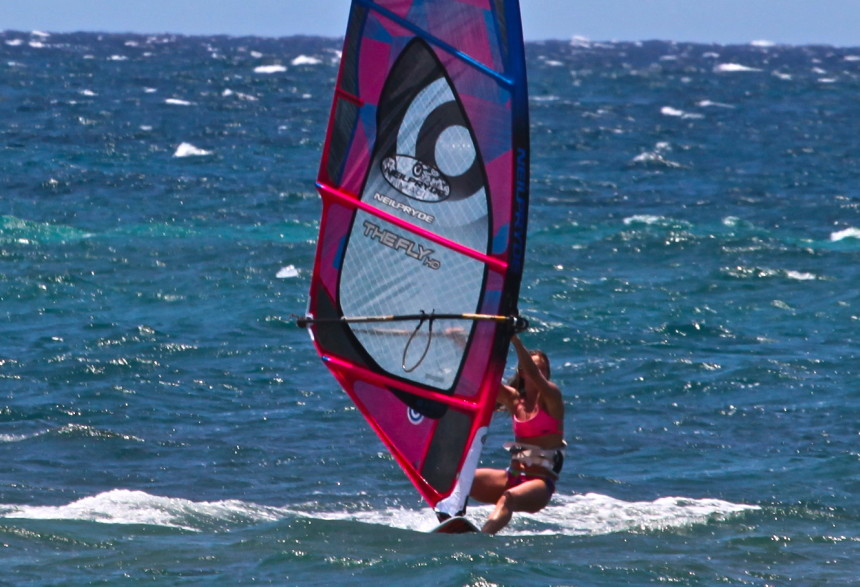
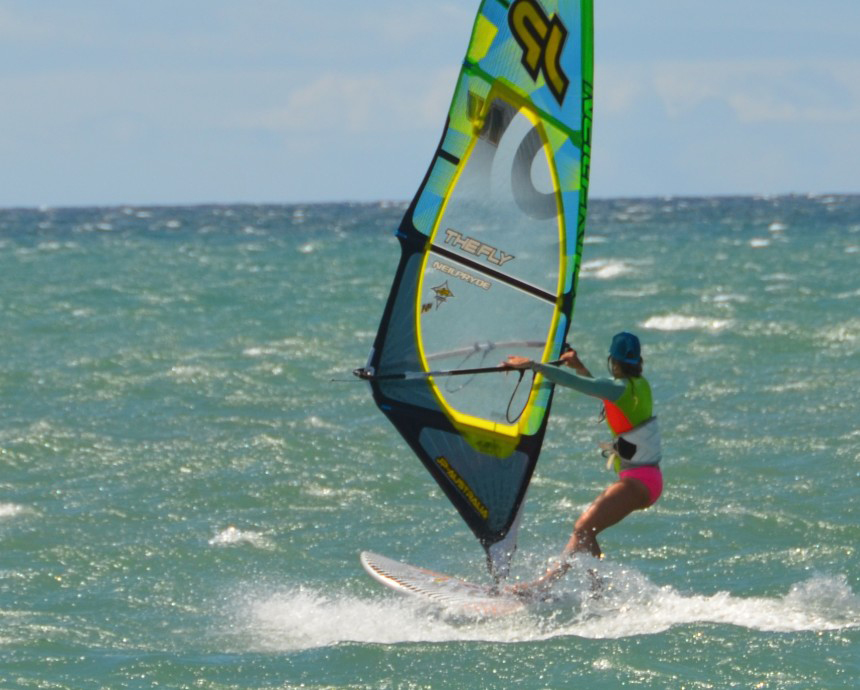
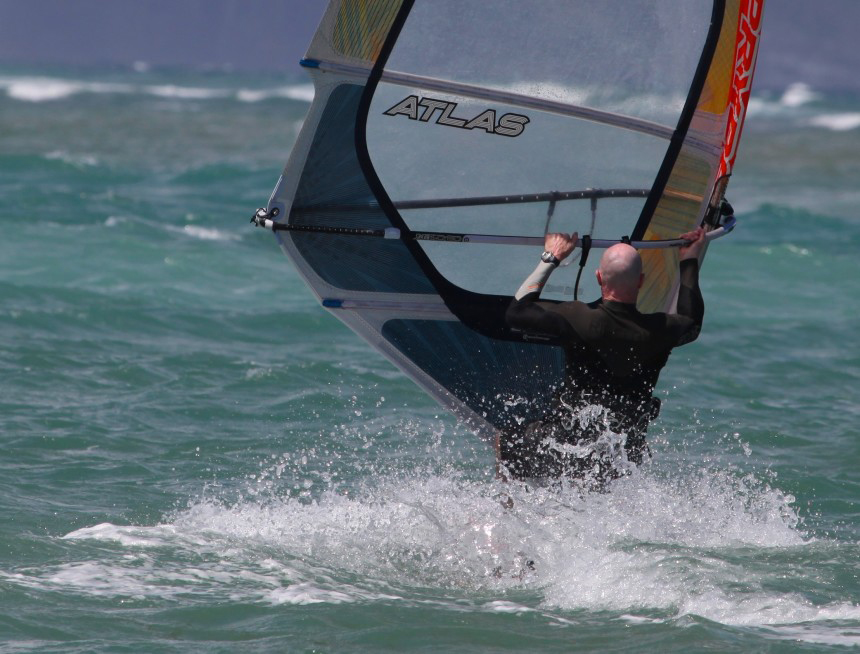
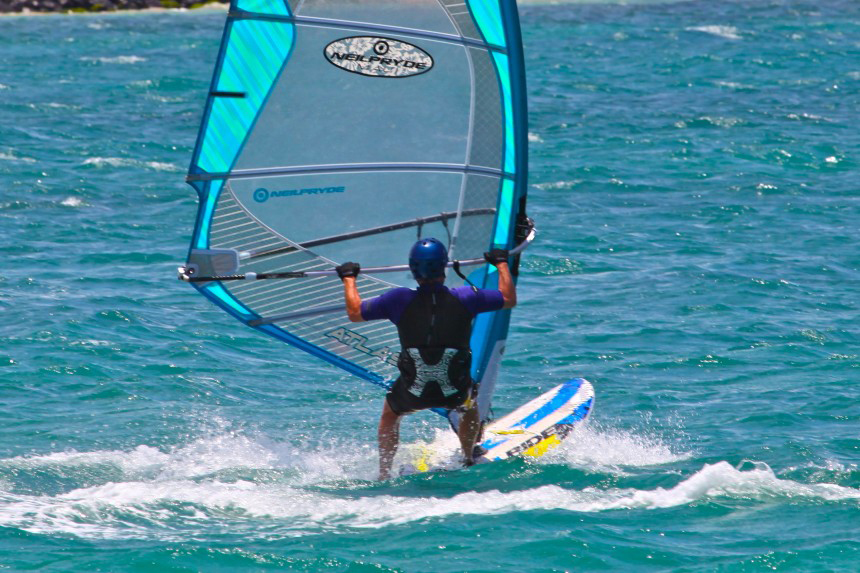
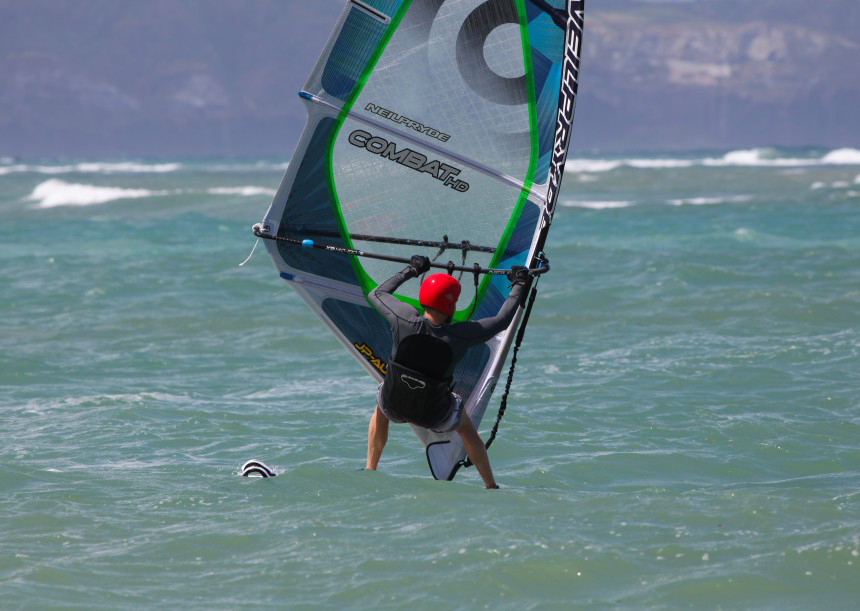
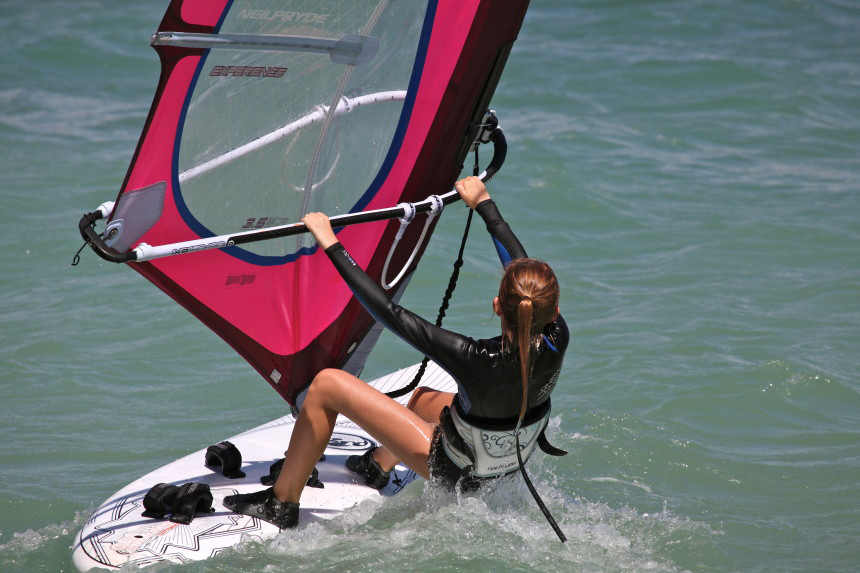
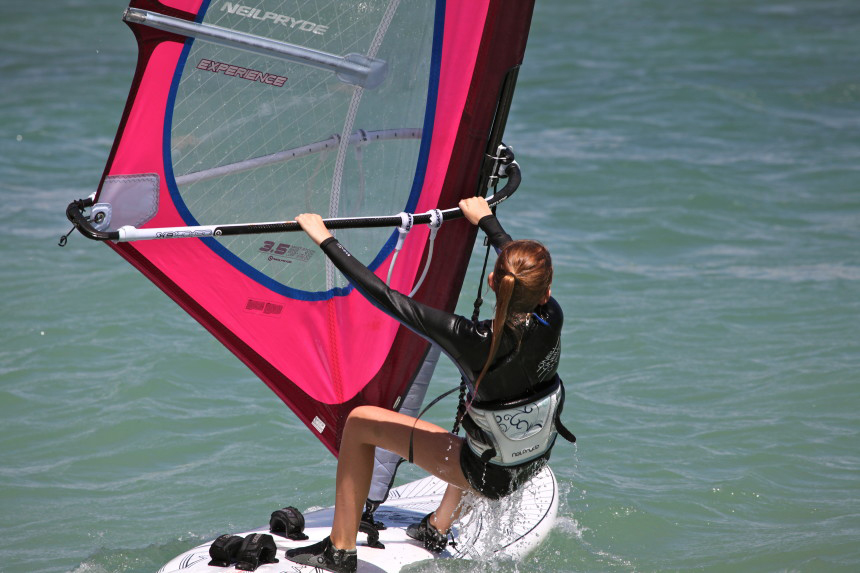
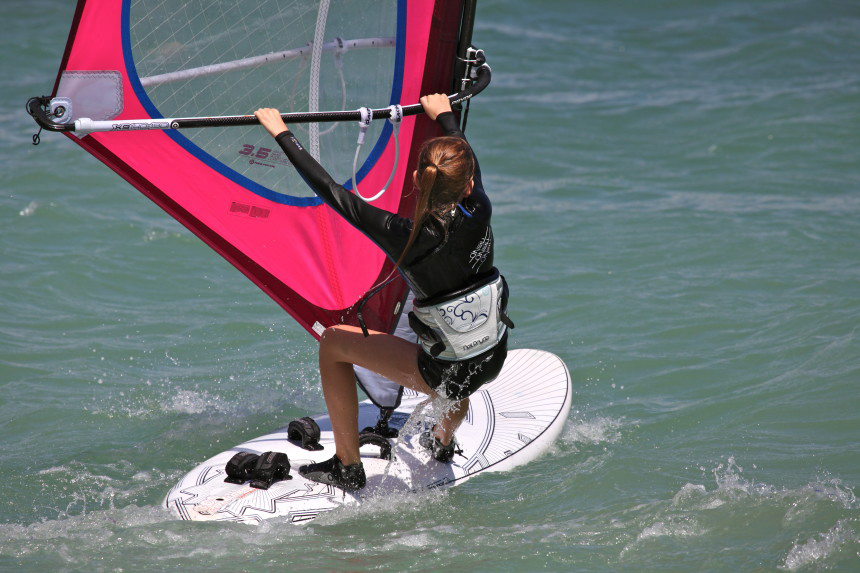
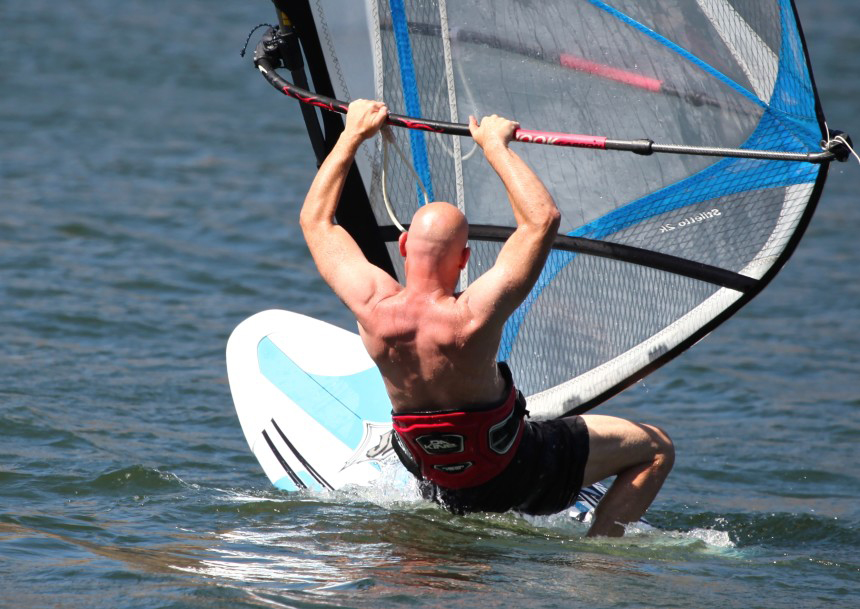
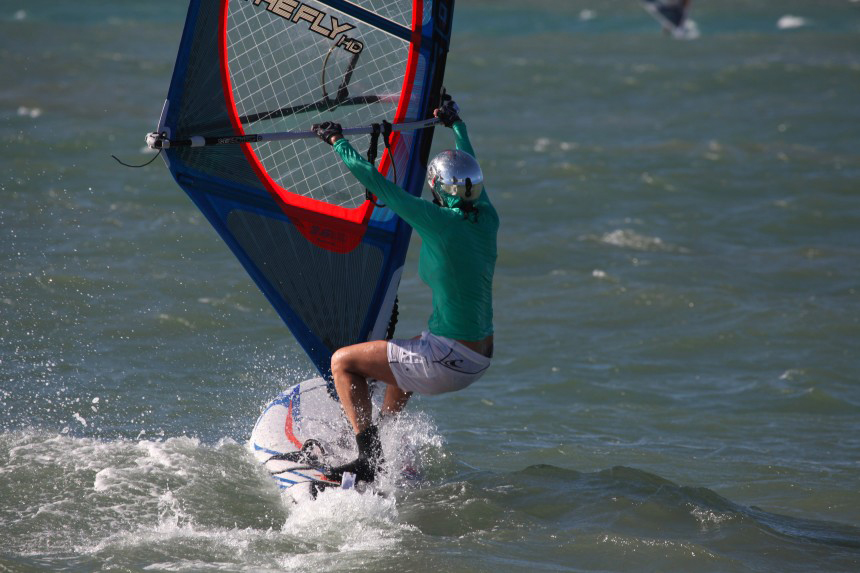
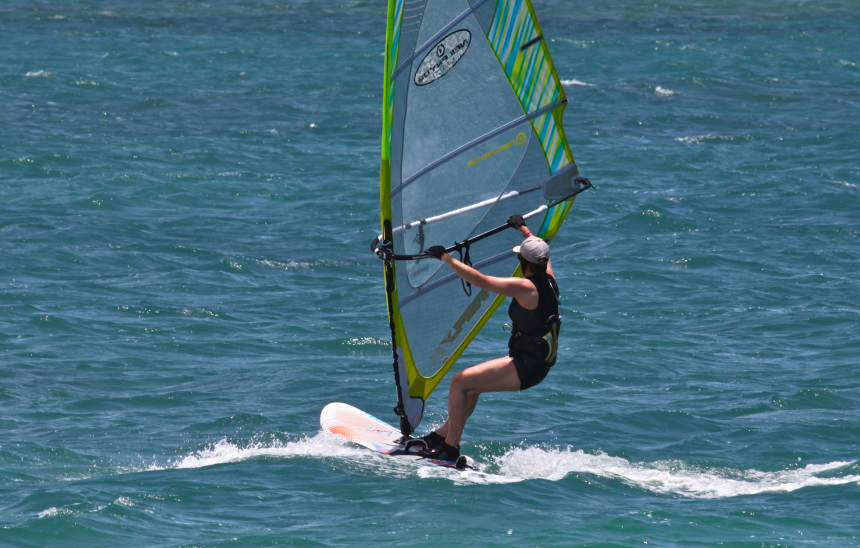
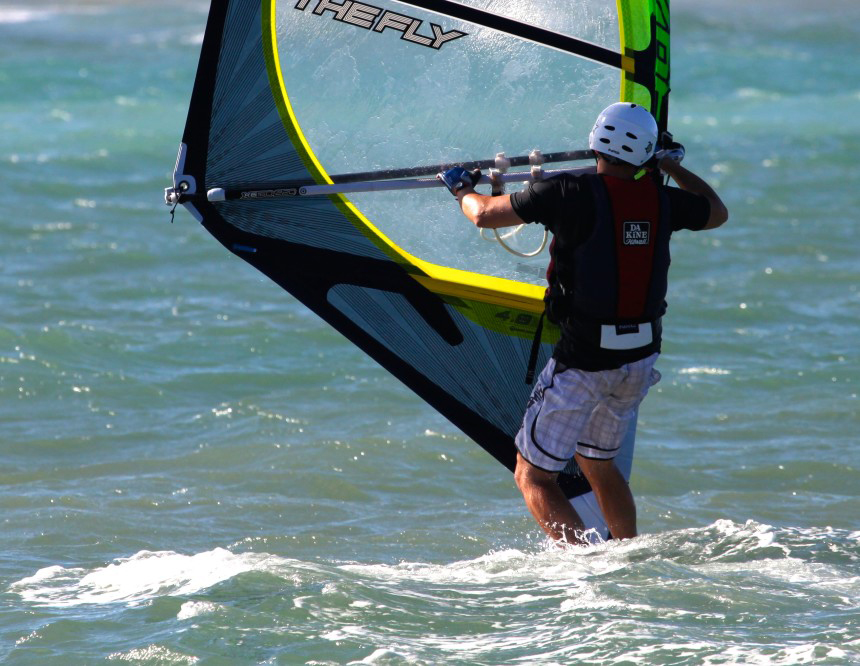
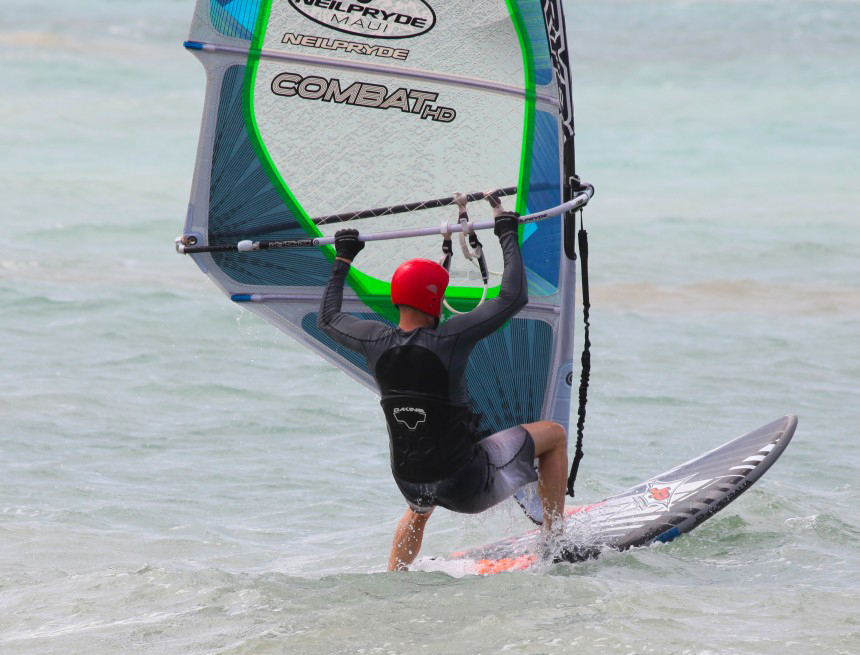
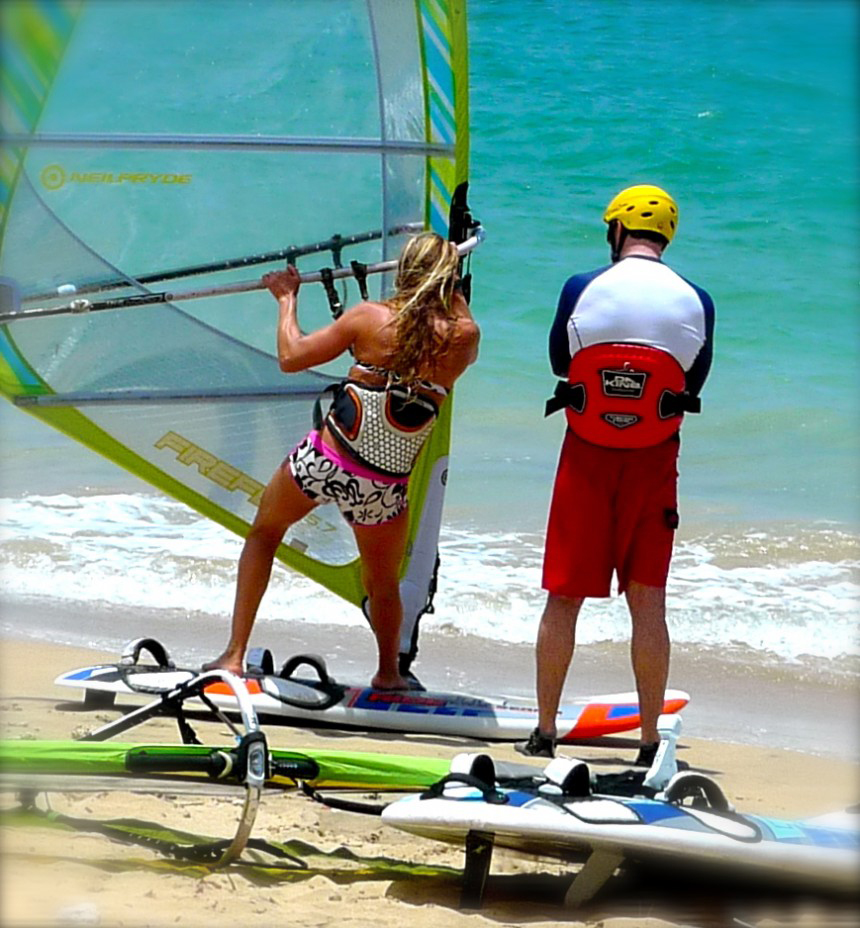
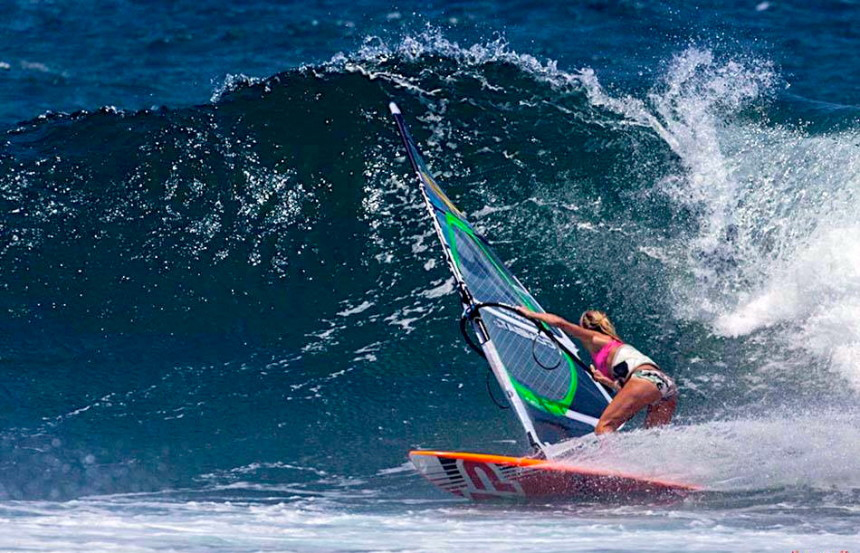
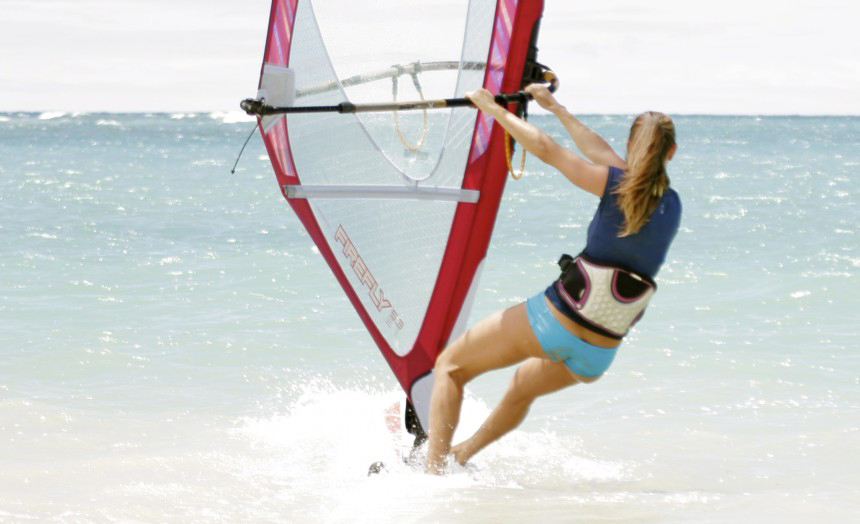
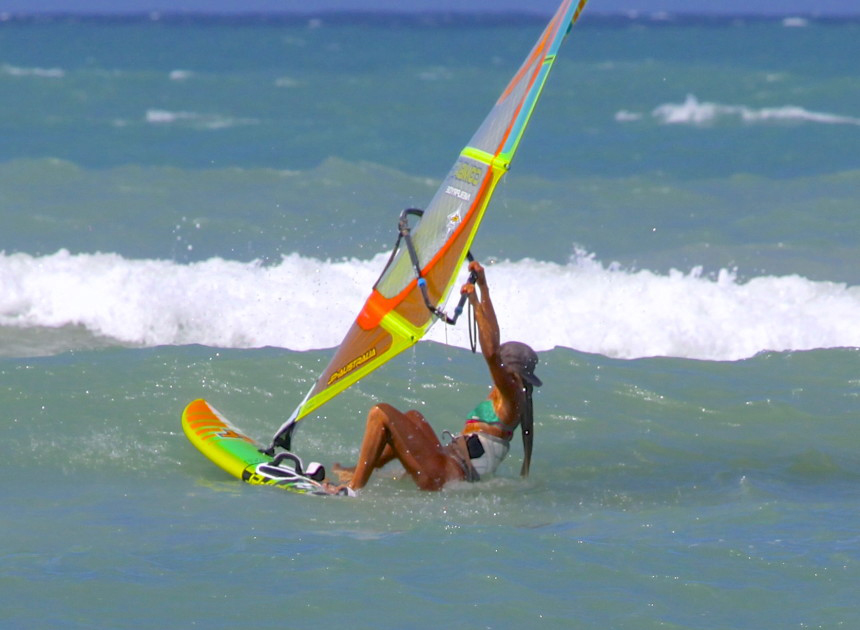
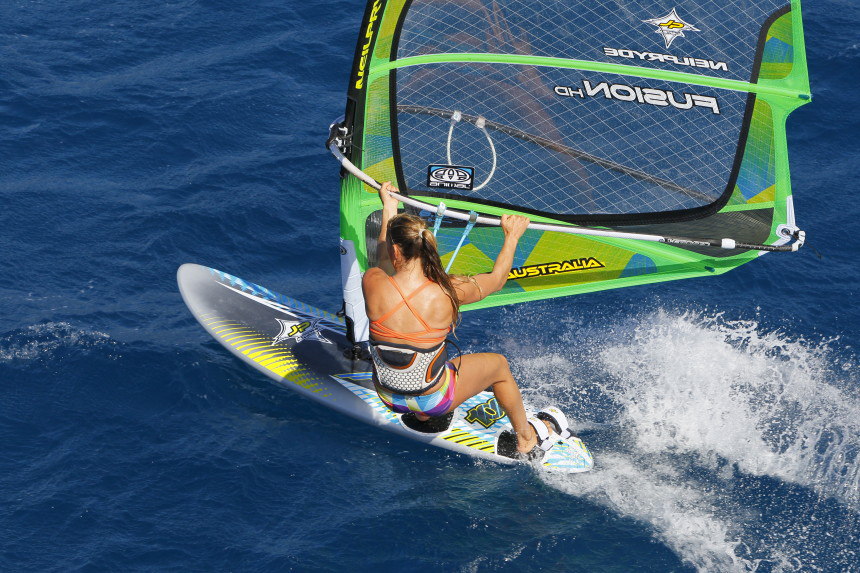
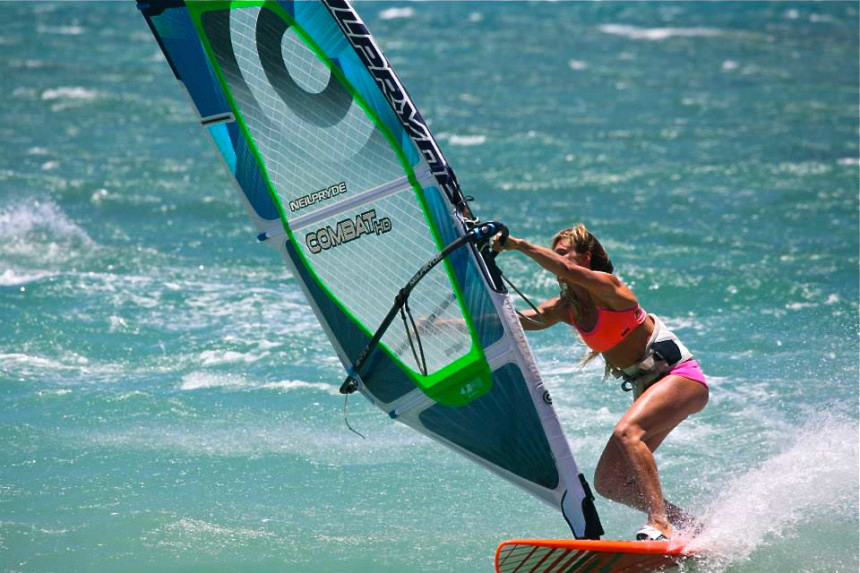
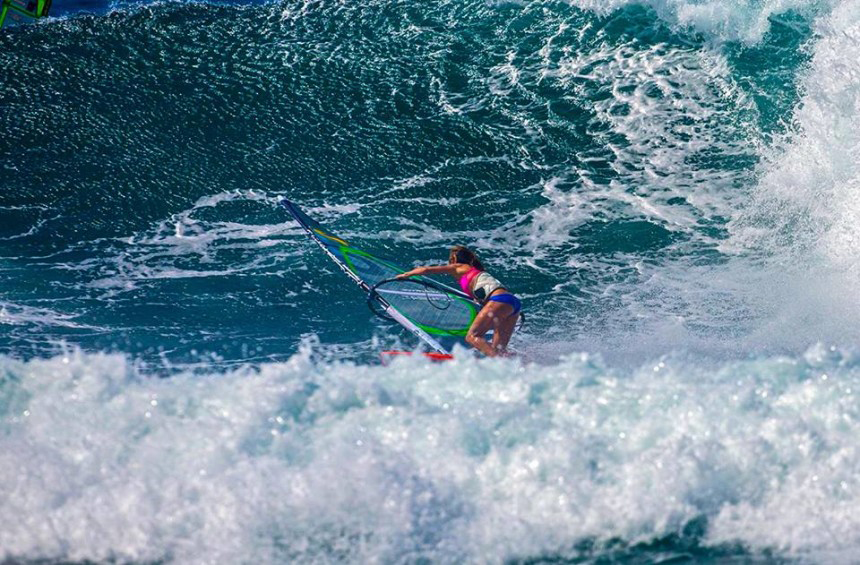
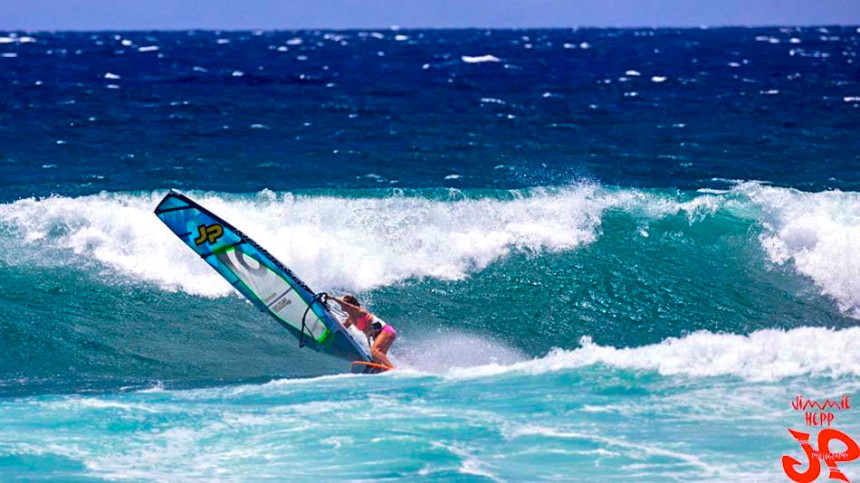
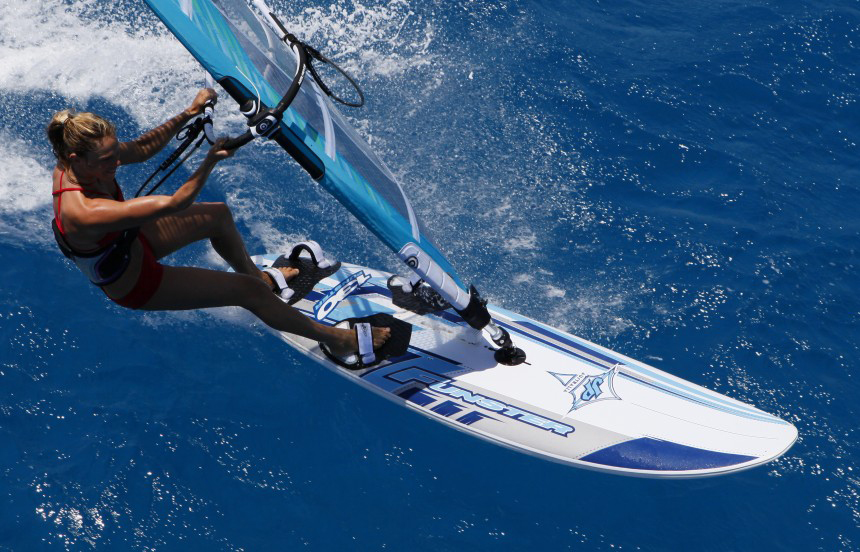
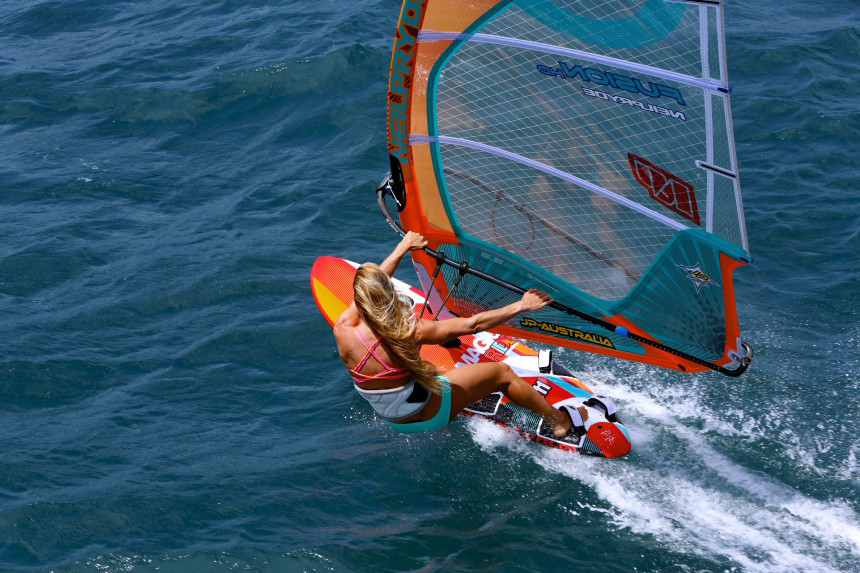
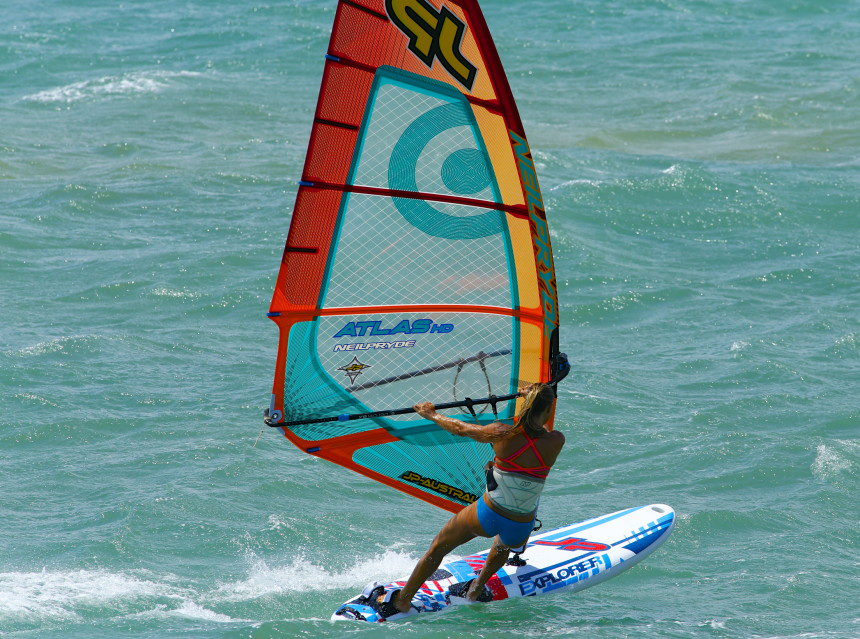
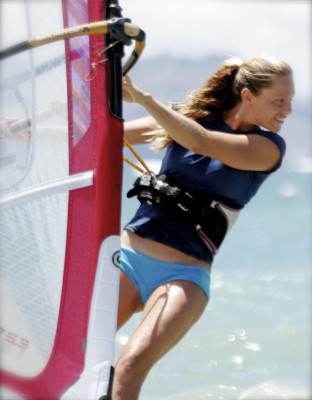
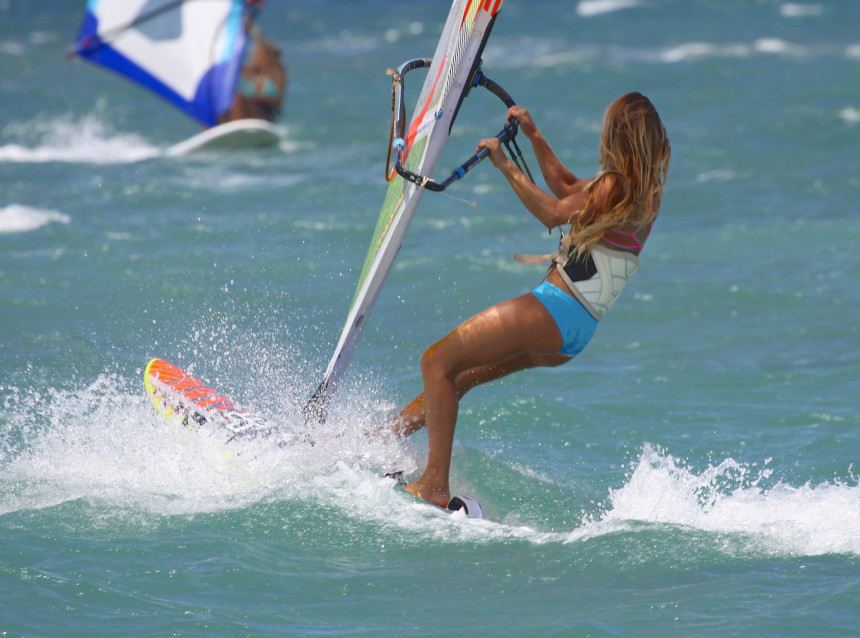
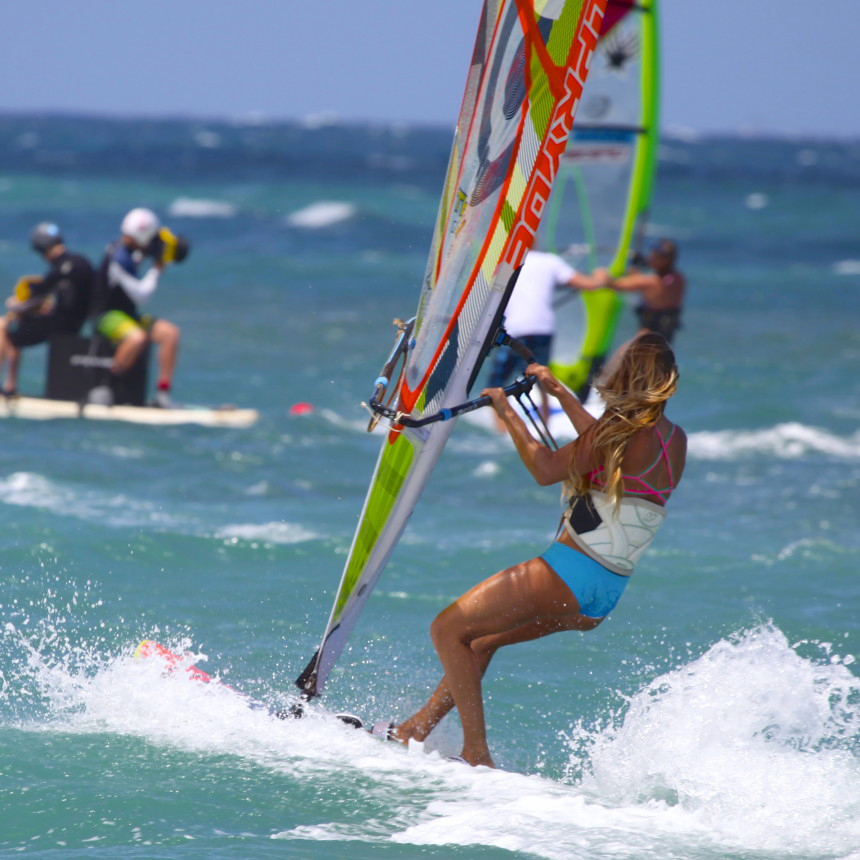
Stance

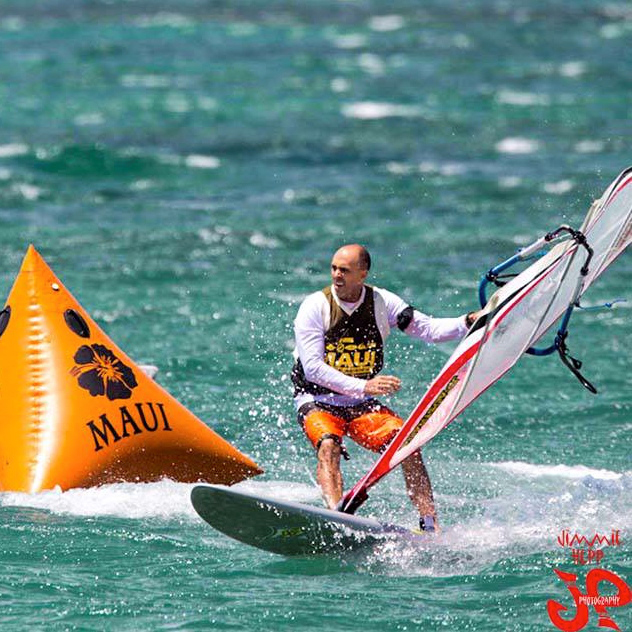
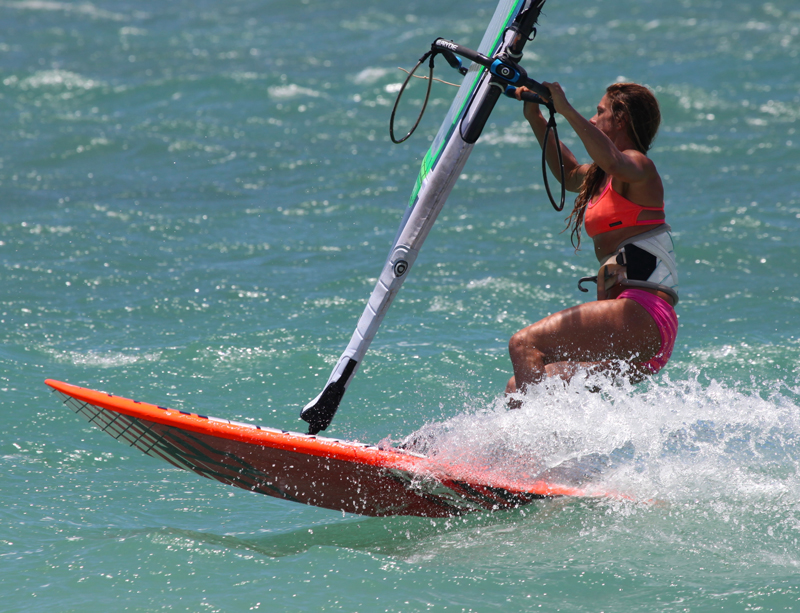
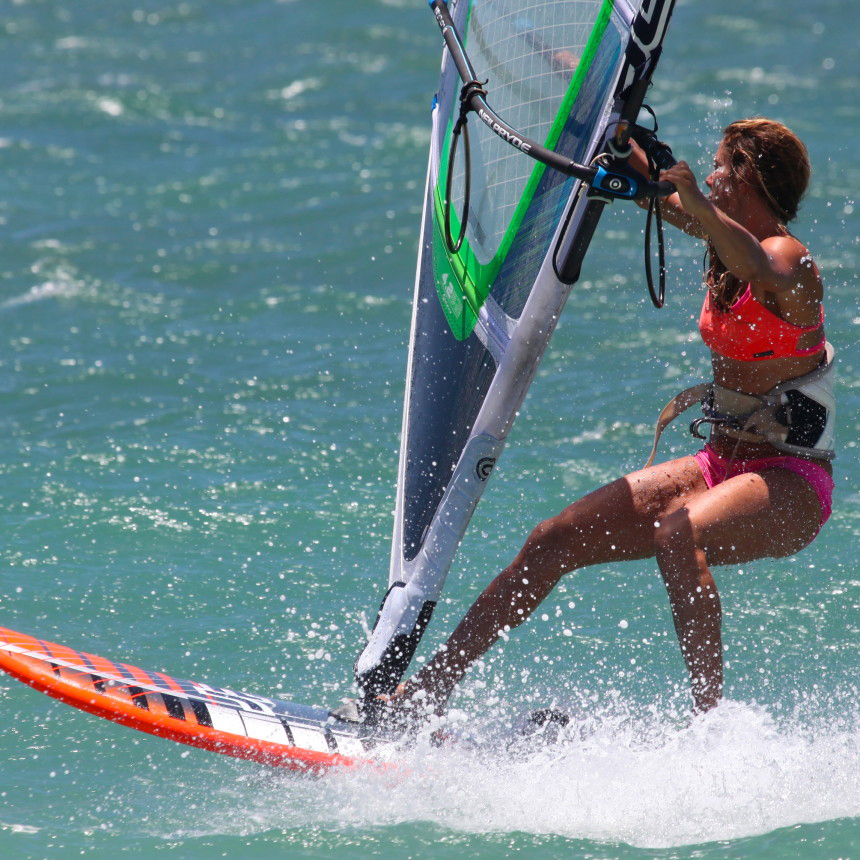
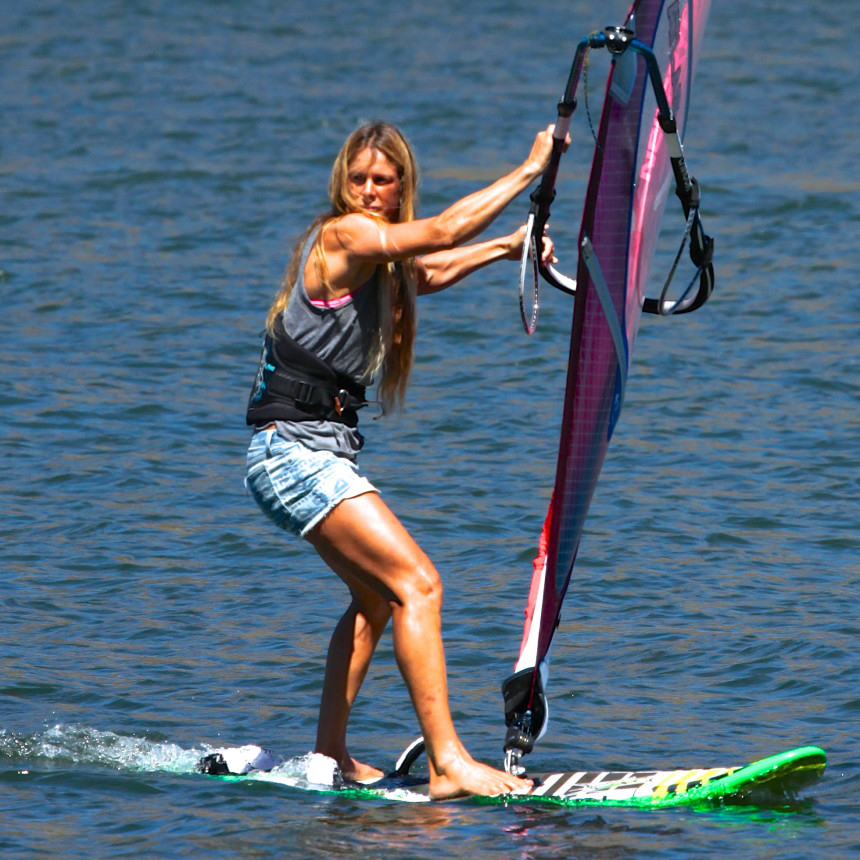
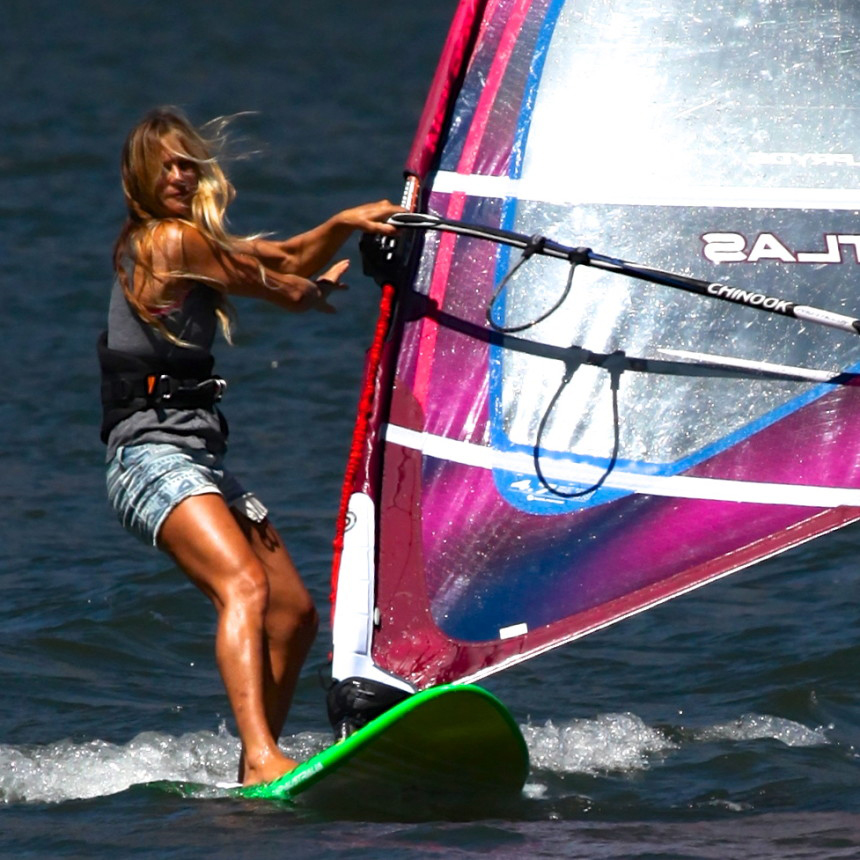
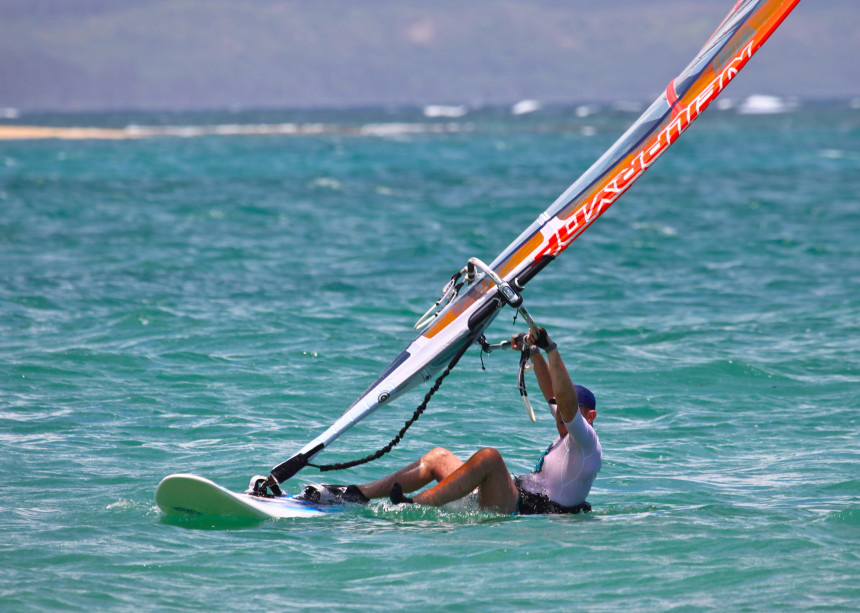
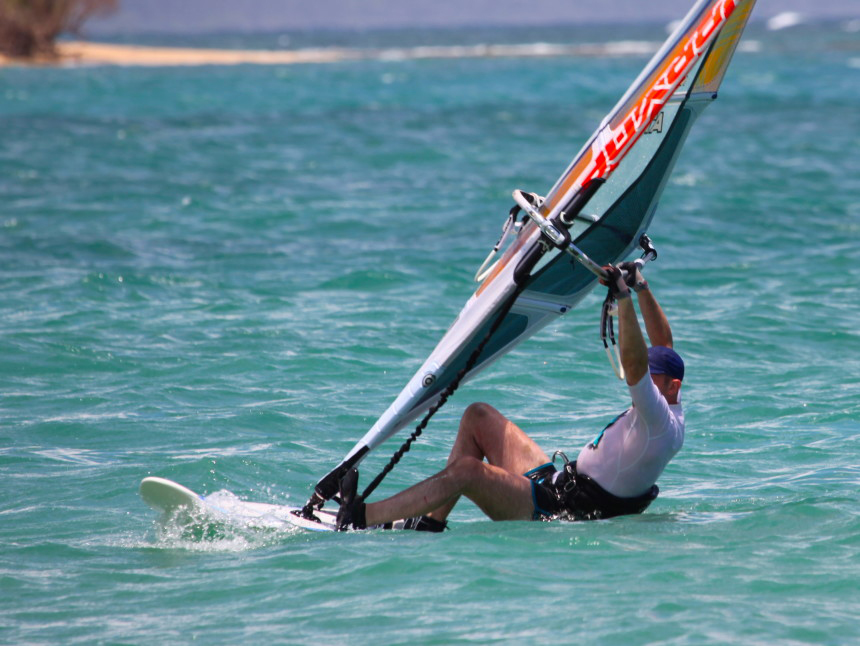
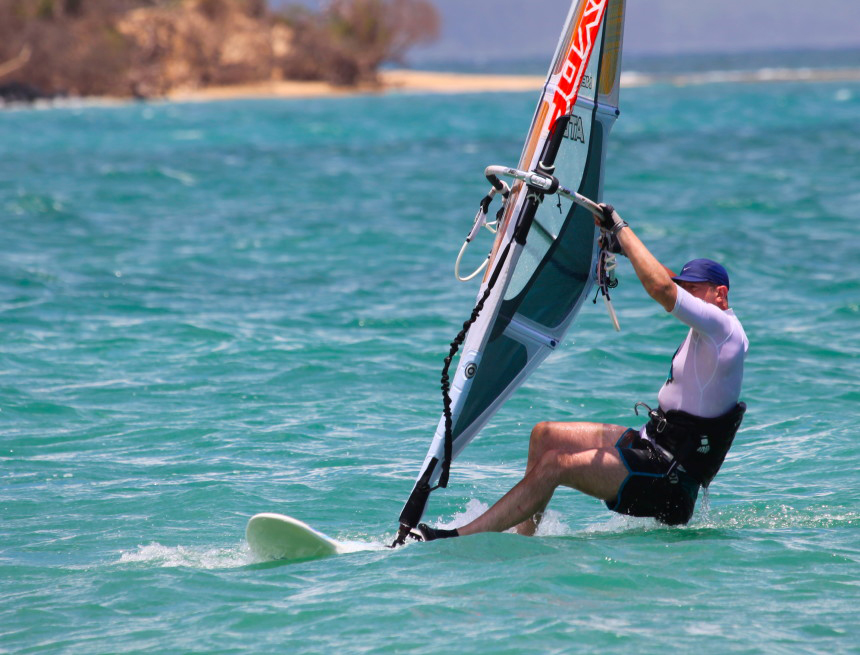
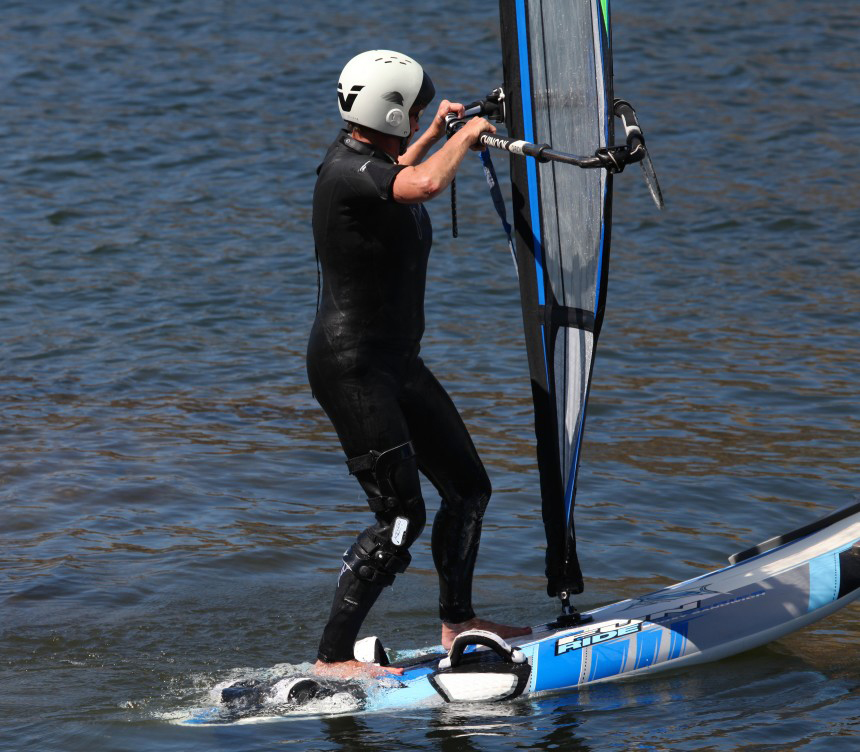
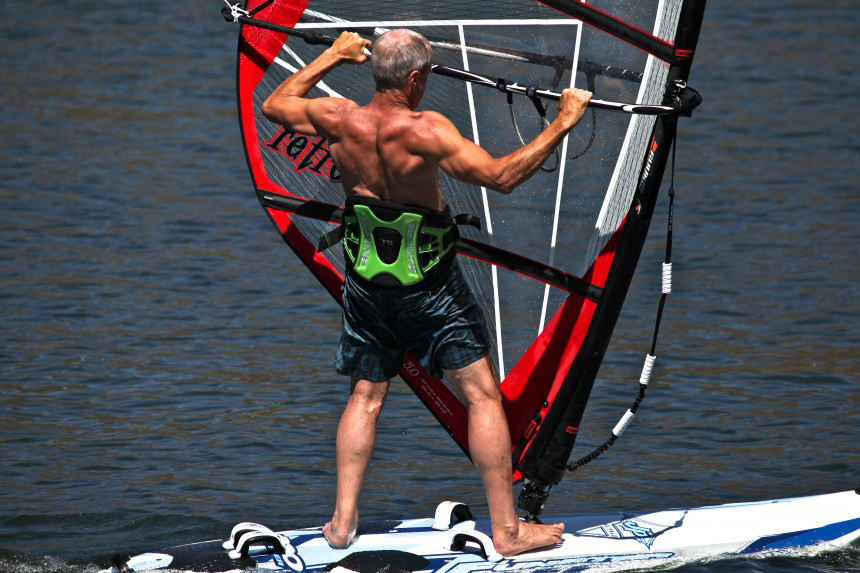
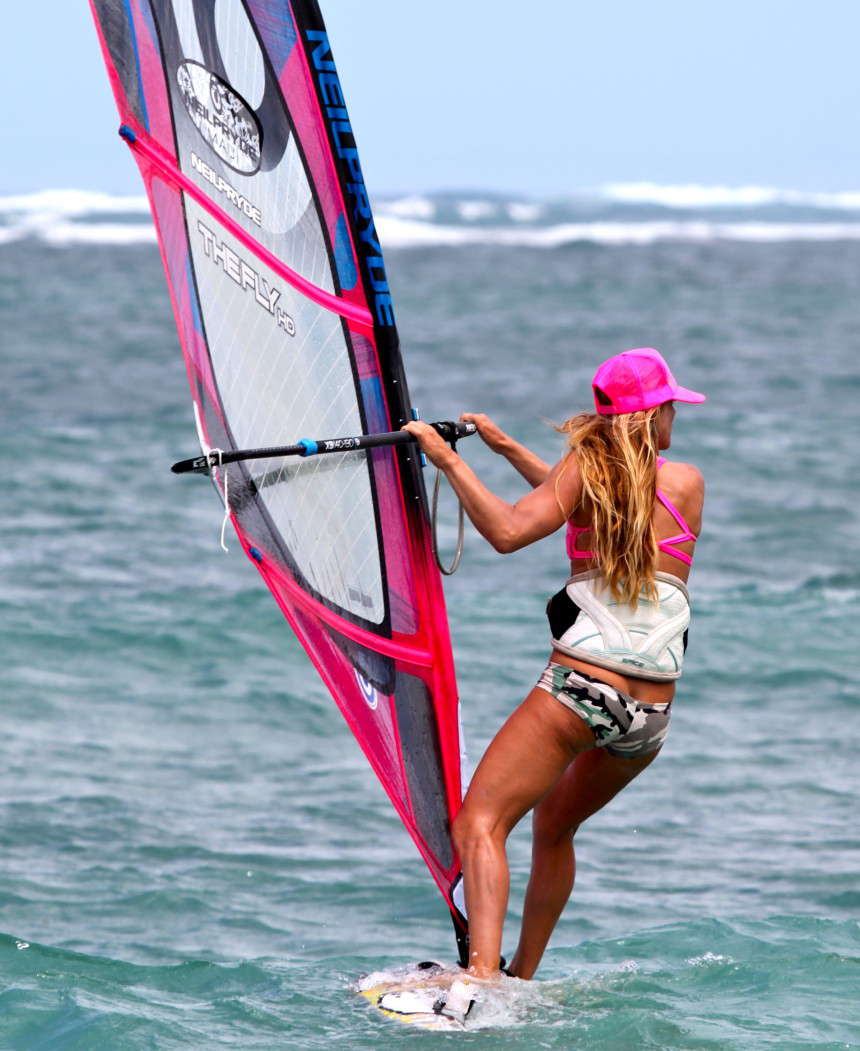
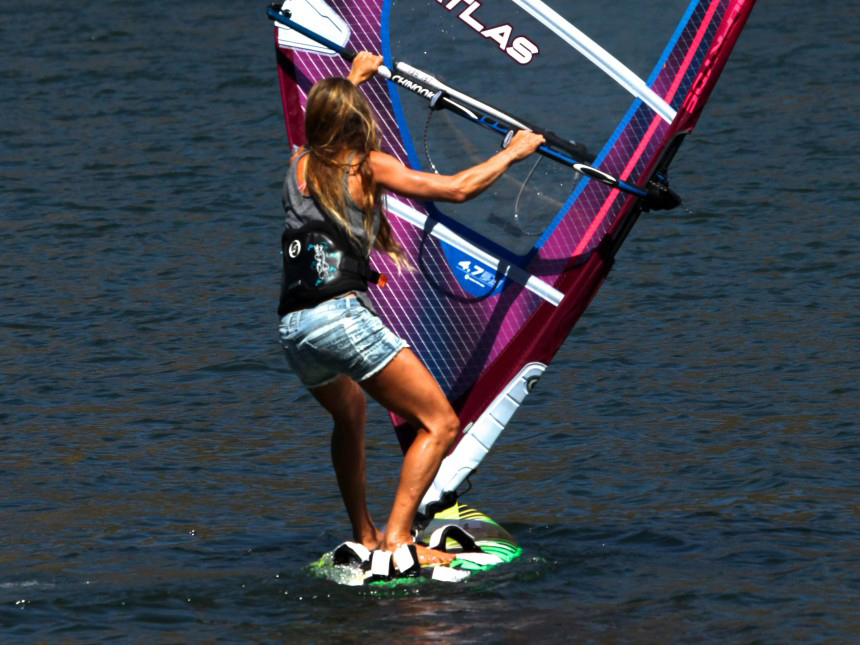
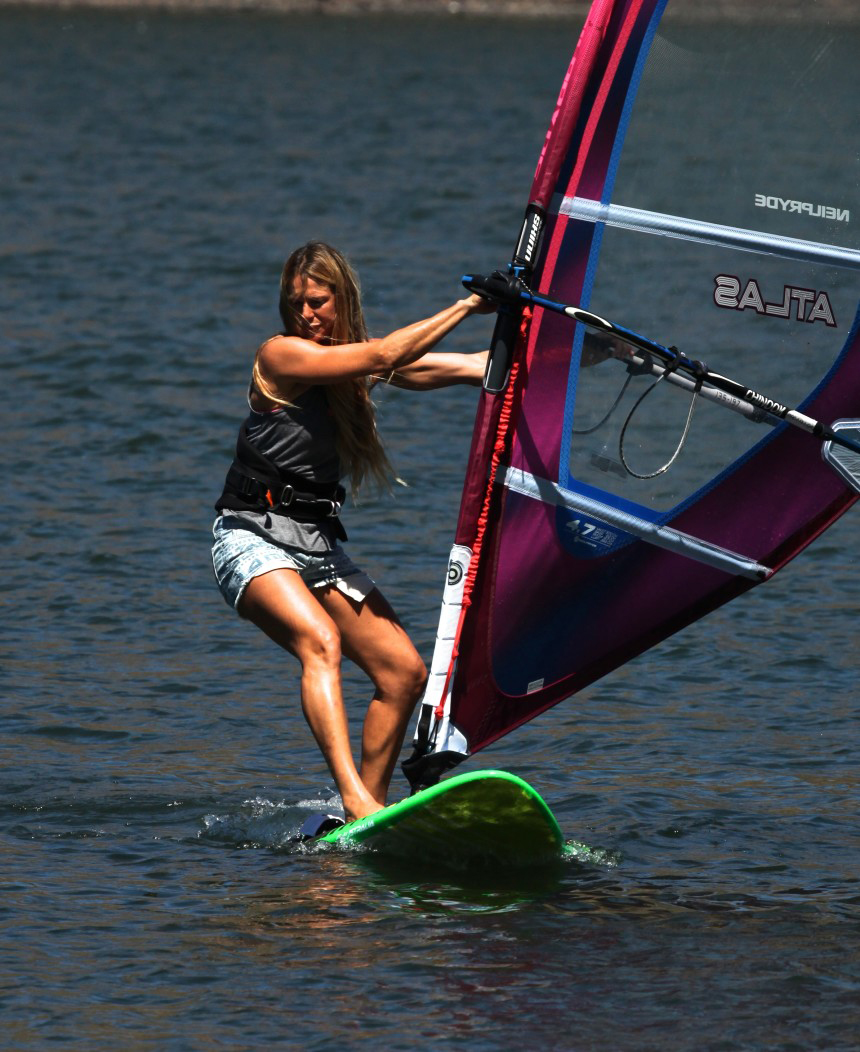
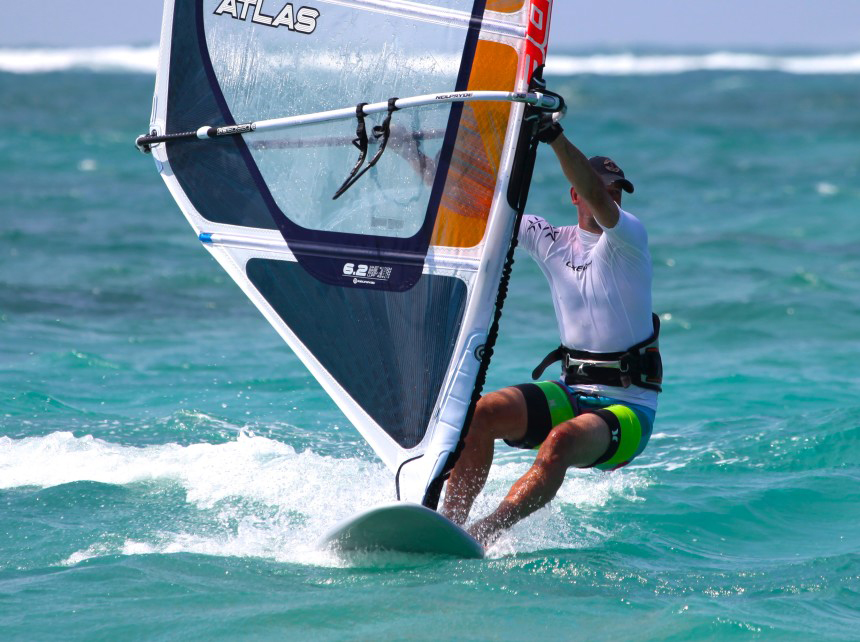
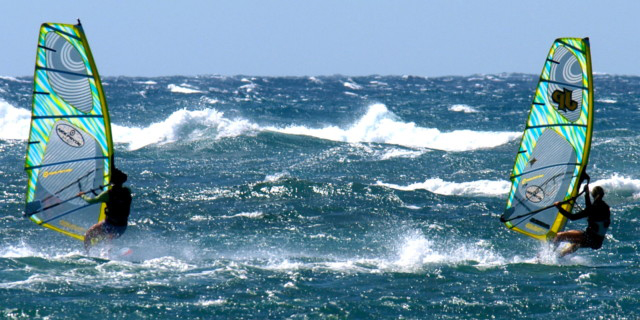
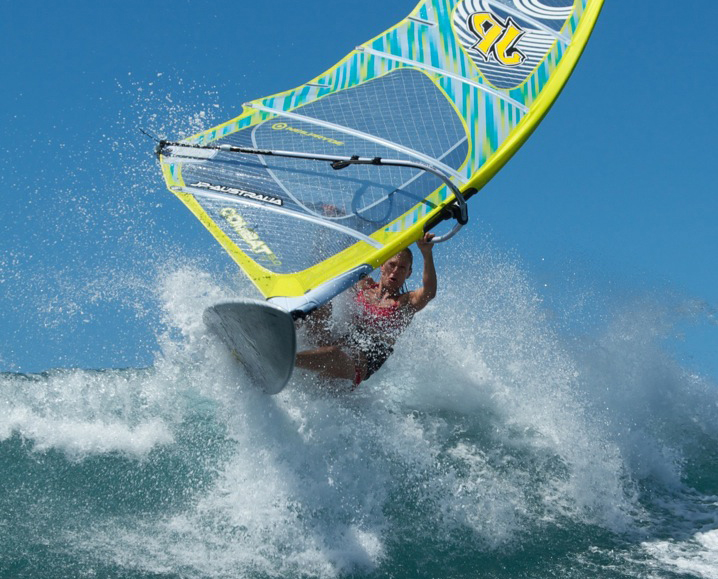
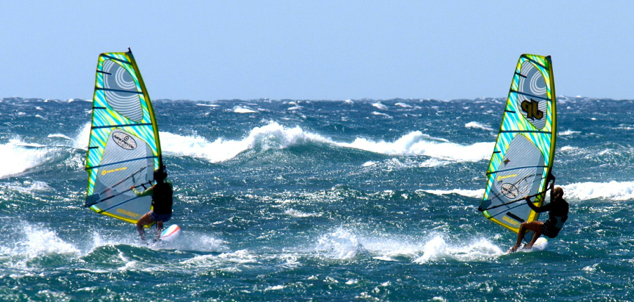
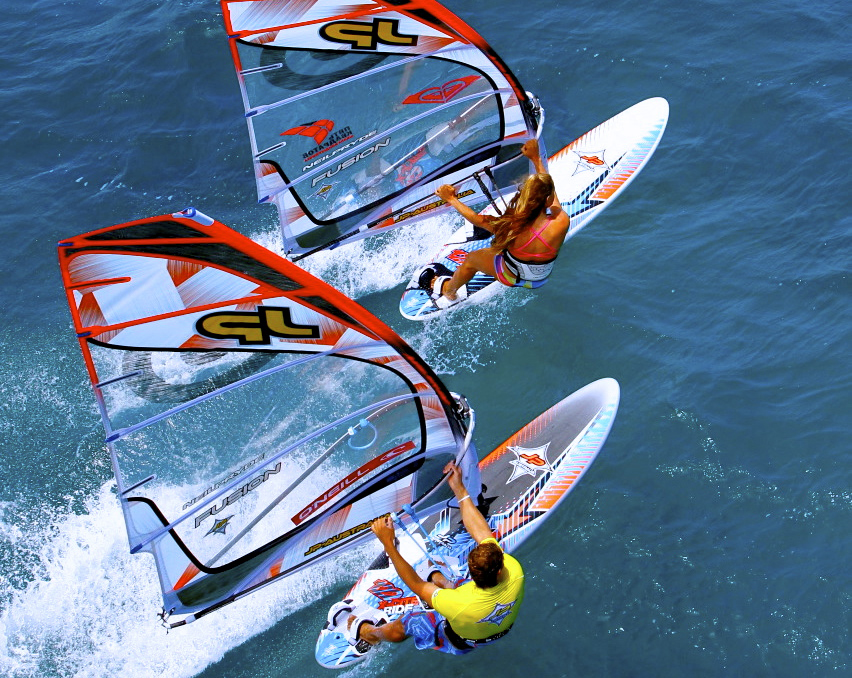
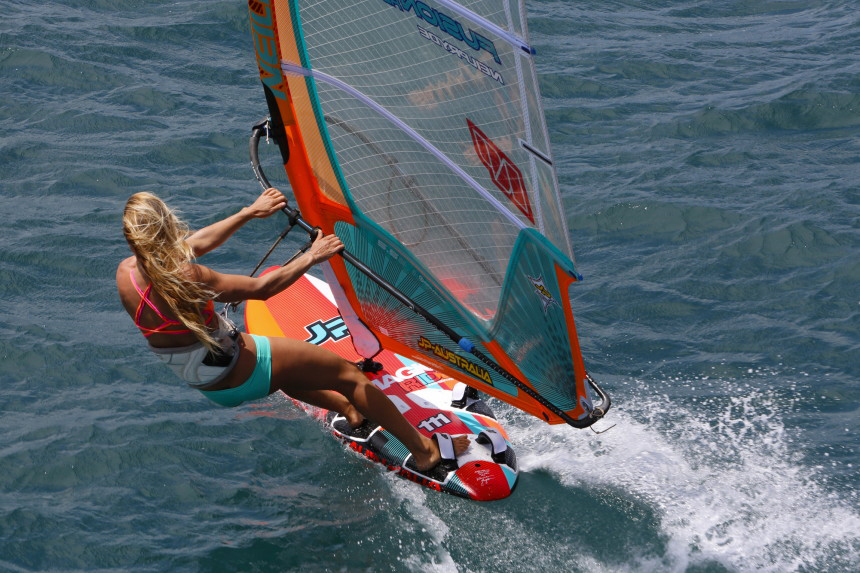
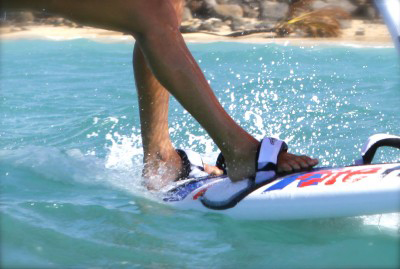
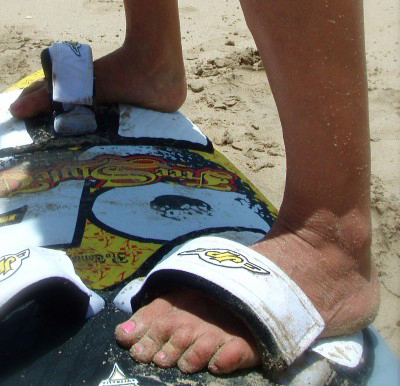
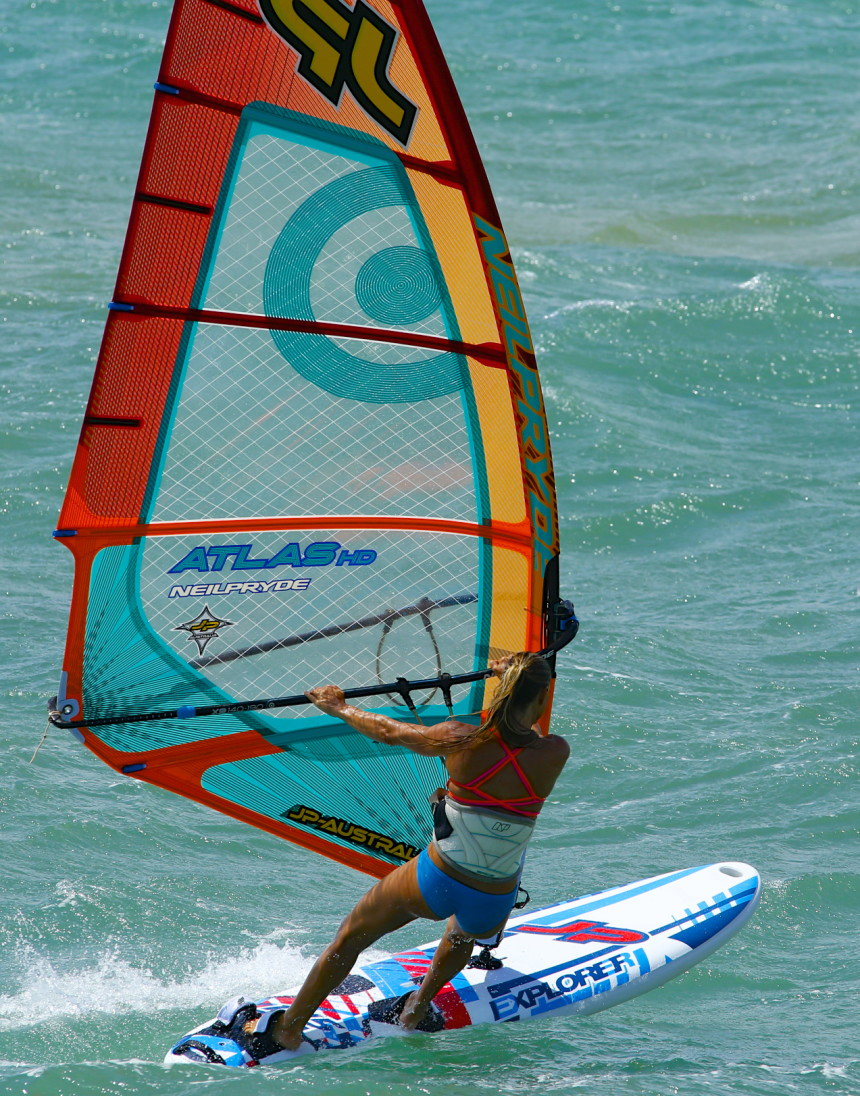
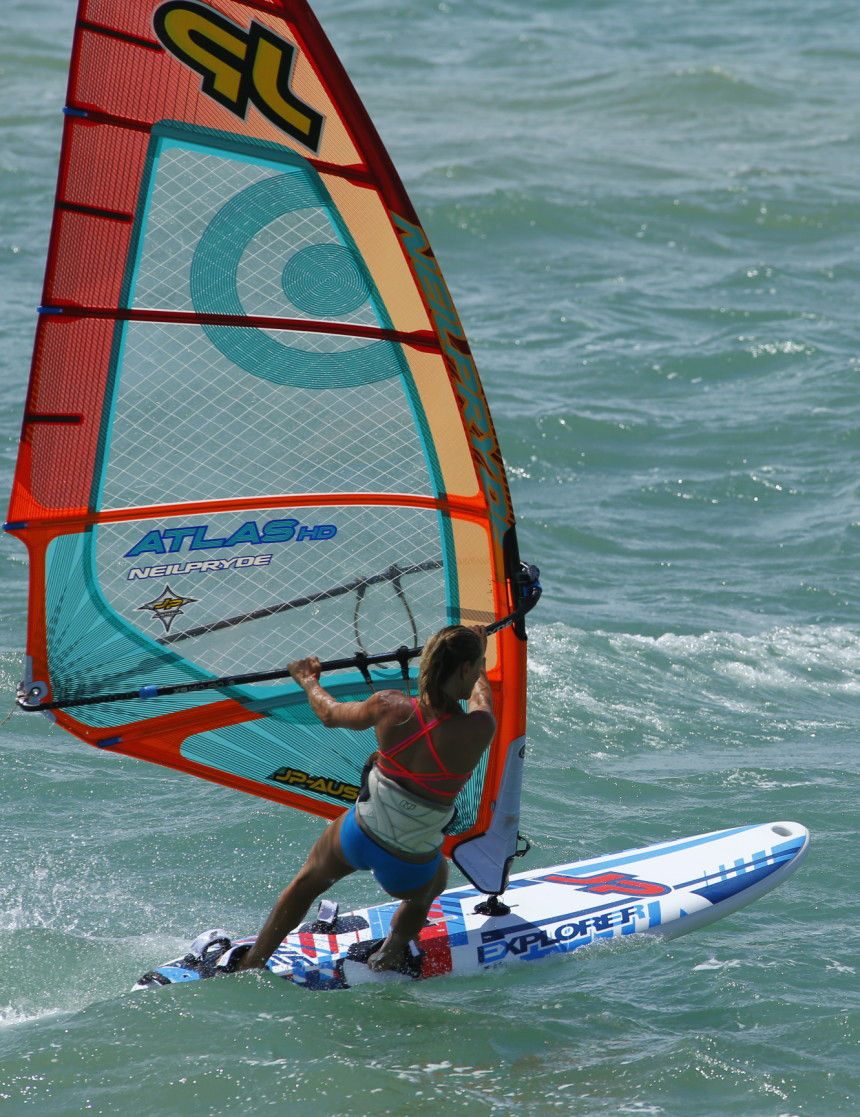
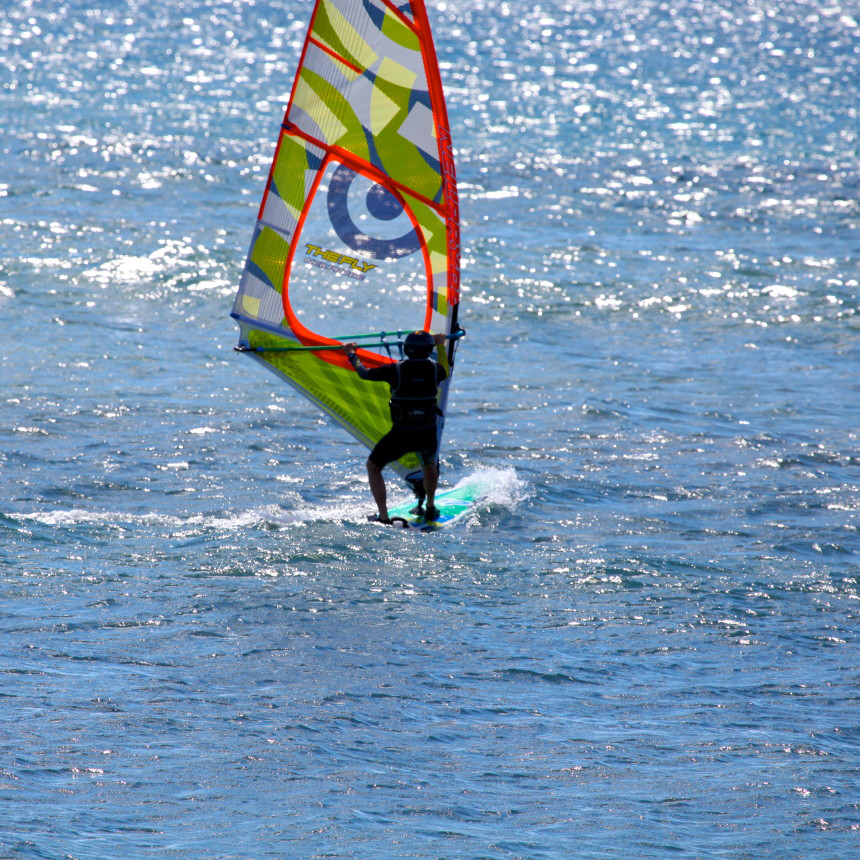
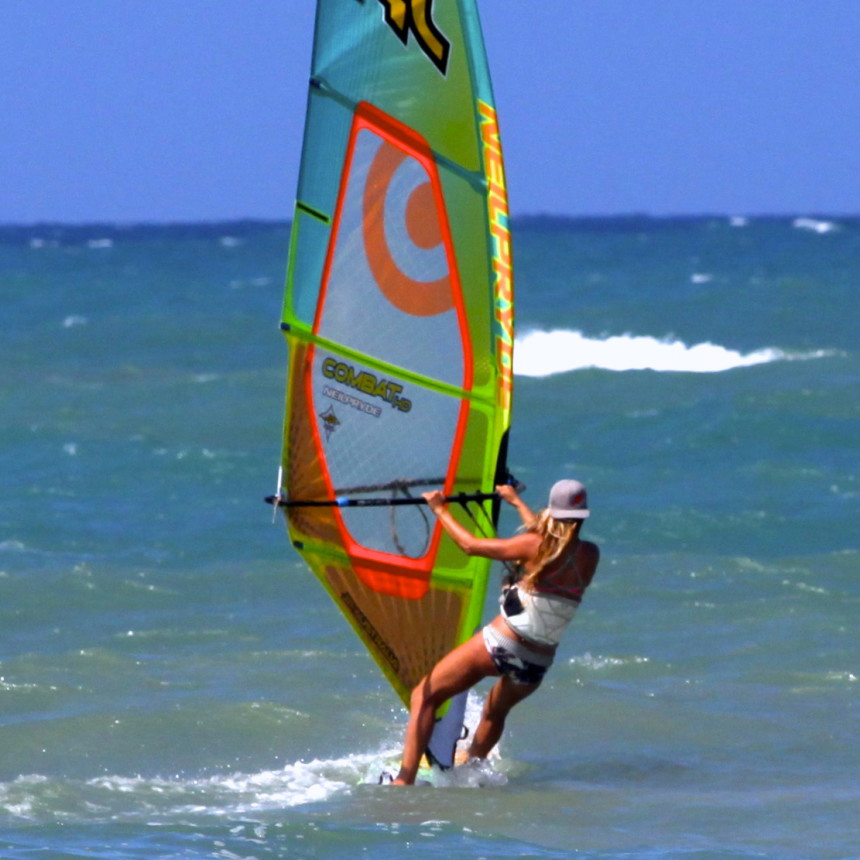
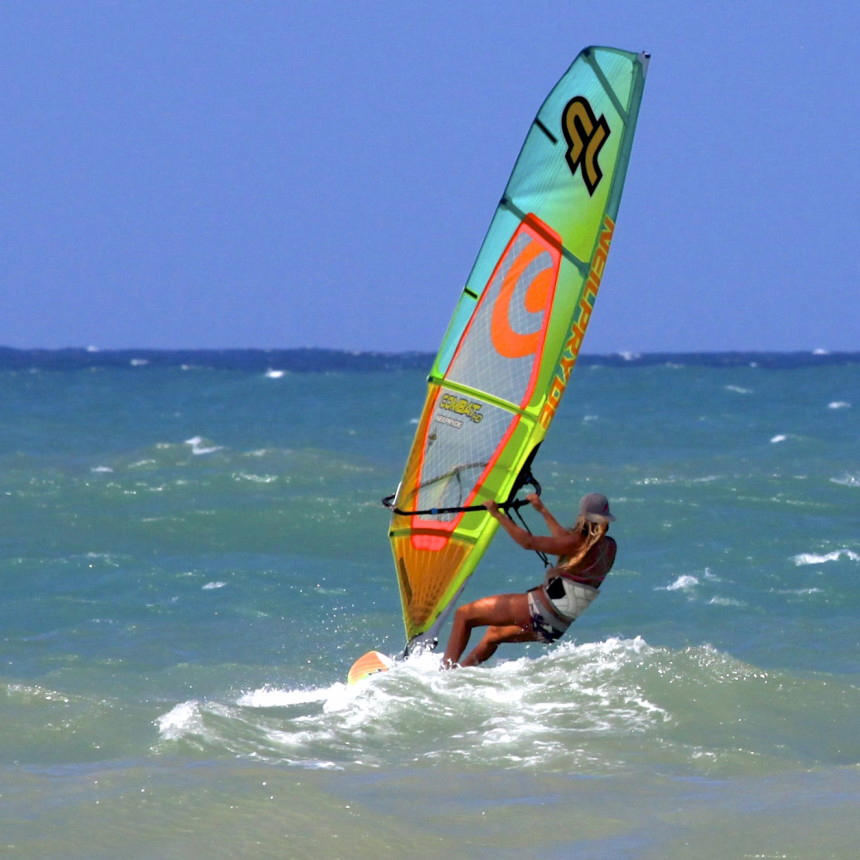
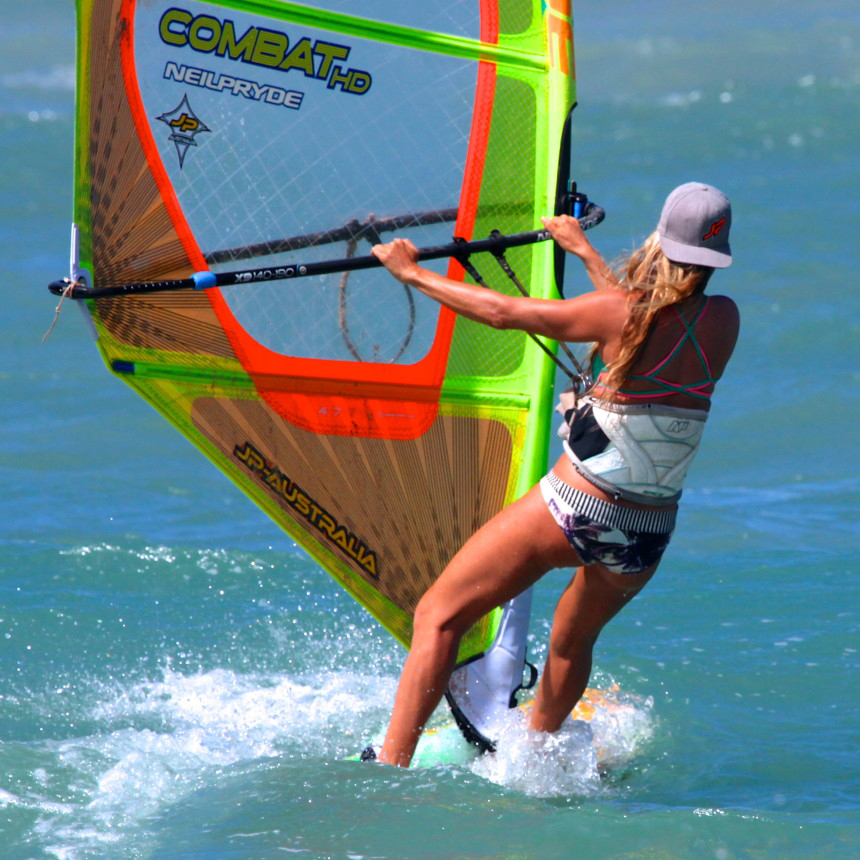
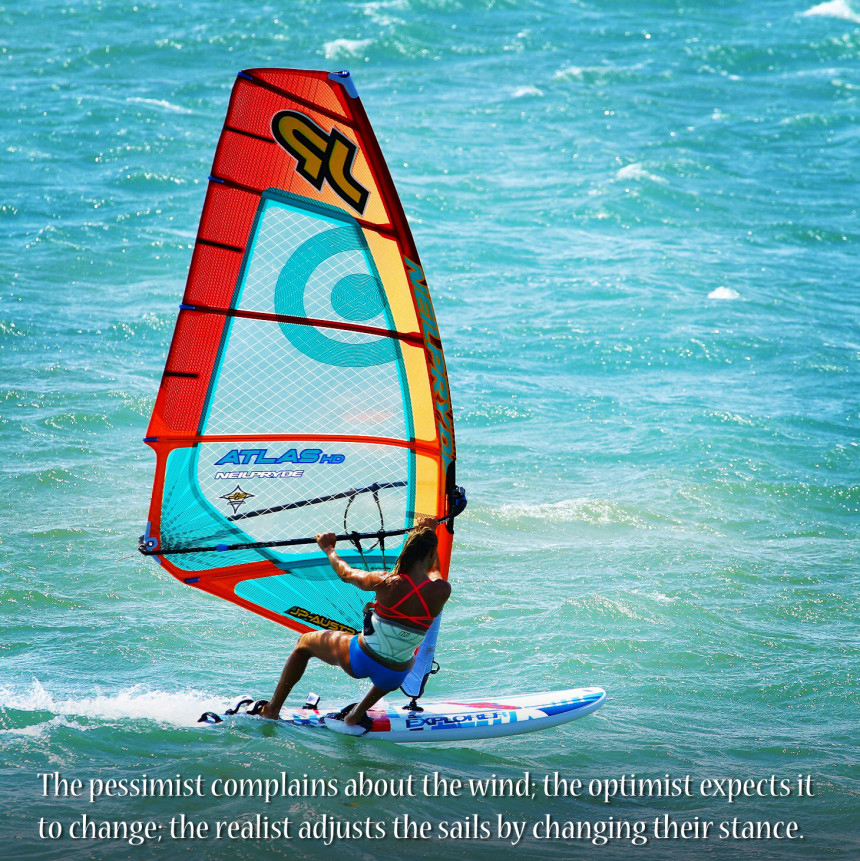
Be ready to change our stance all the time! This is the flow and rhythm part of windsurfing. In a lull we are more upright and in a gust we sink deeper into our harness lines like the photos below:
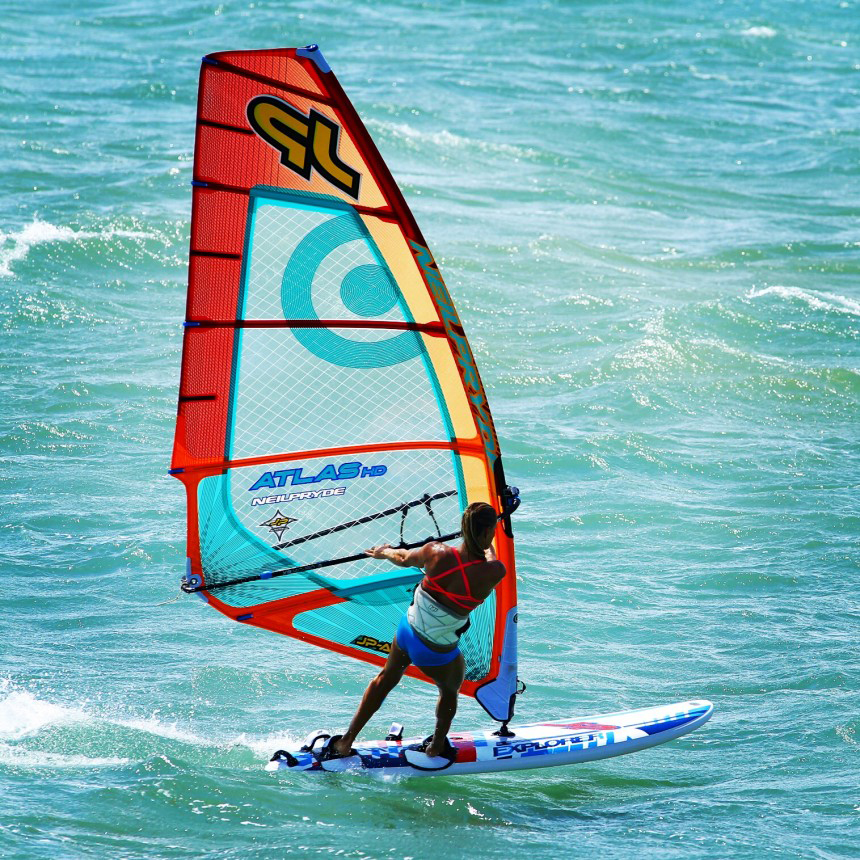
Happy Sailing.

Shawna

June 10, 2015Comments are off for this post.

Windsurfing Summer Exercises

Flipping Sails

Perfecting our rig flipping technique can be practiced all summer long. In all strengths of wind- light winds on SUPs with a sail and/or in high winds to come out of your gybes planing.

The Trick is to Actually Perfect the Form

The same technique is required to flip the sail for beginners, intermediates and experts- It’s used for non-planing gybes, slam gybes, planing gybes, high wind and lighter wind gybes.

Light wind days are your windsurfing Tai Chi opportunities. Jump on SUP or a very large stable windsurfing board- Flip the sail (correctly) over and over again until you no longer need to look at your hands and your form is flawless-

Do this all summer long and you will be shocked what comes out of it the next time it’s windy. You will probably find yourself racing out of your gybes planing and beating the pack!

WARNING: If you go and practice bad form—You will permanently lock the mistakes into your Muscle Memory.  Imperfect form is: Looking at your hands, dropping the sail behind you, missing BOOM SLIDE, not using Rescue Stance, Not getting your back hand back before you engage the turn, yanking on the sail with the back hand when you reach for the new side etc…

Muscle memory has been used synonymously with motor learning, which is a form of procedural memory that involves consolidating a specific motor task into memory through repetition. When a movement is repeated over time, a long-term muscle memory is created for that task, eventually allowing it to be performed without conscious effort. This process decreases the need for attention and creates maximum efficiency within the motor and memory systems. Examples of muscle memory are found in many everyday activities that become automatic and improve with practice, such as riding a bicycle, typing on a keyboard, typing in a PIN, playing a musical instrument, or martial arts.“

6 Steps to Flip a Sail

1. Wide grip on the boom- The back hand is back anytime we are going into any kind of turn. Stay Low.

2. Look into the turn. (never look at your hands)

3. When the sail pulls (As the board turns all the way back to the direction you just came from) Step the back foot right up to the mast into Rescue Stance – Hold on and stay In clue first sailing position for a beat. – don’t look at your hands- Stay Super LOW.

Hint 1: practice your clue first sailing skills in light winds.

4. Boom Slide: Sliding your front hand as close to the mast as possible on the boom. Don’t look at your hands. Look back to where you just came from. At least look at the clue. Stay LOW and don’t look at your hands.

5. Back hand reaches the other side of the boom. Back hand reaches under the front hand -not over. Stay low. Reach as far down the boom as possible- aim for the harness lines on the new side of the boom. Don’t look at your hands.

Hint: Guide the sail towards to nose of the board as you let go of the sail. From one should to the other. Strength is involved here but not so much to do with your muscles. It’s more like guiding the power and momentum in the direction you want it to go. Think Bruce Lee.

6. The new back hand simply holds on without pulling or yanking: Back to Rescue Stance: http://www.shawnacropas.com/rescue-stance/
Hint: Rescue stance is the key to planing out of gybe: Using your weight to counteract the power. By hanging- Not pulling in with just the muscles in your arms.

Hint 2: Pulling on the back hand during a powered up state is like revving an engine. It’s how we do catapults and forward loops.

Light wind practice looks like this:

Things to Avoid

Don’t look at your hands and/or do a over hand reach. It makes you stand up and drop the sail behind you.

Pay attention to correct foot work- At this moment use Rescue Stance. Feet too close together is imbalanced and sinks the back of the board. Boom Slide great! Looking where you want to go and not at your hands- Perfect. Now to guide that sail towards the nose of the board!

Here is what happens when our front foot does not come out of the footstrap in time. Front foot should come out a few beats earlier and slide across the board. ( Not step back). The old back foot should step up to the mast foot into Rescue Stance as the board turns shy of 180 (170), where you should find yourself in a clue first position for a beat.

Finding yourself in the clue first position for a beat looks like this- You can stop here for a second to focus at looking past the clue to where you want to go. (Back out to sea in my case). It gives you a beat to think about Boom Slide and reaching underhand to the other side without looking at your hands. Best to do this in lighter winds. Eventually all these perfected movements will come together into a fluid gybe.

More examples of how you want to look while flipping a sail in light or high wind gybes!!!

Have Fun windsurfing this summer!

January 4, 2015Comments are off for this post.

Rescue Stance

by Shawna Cropas

Rescue Stance is the most stabilizing body posture and a ‘core skill’ that we use at many different stages of our windsurfing game. The Rescue Stance is a major contributor to smooth execution, easy take offs from the beach, exact landings of a move and general perfect form in windsurfing. It’s the key to coming out of our jibes planing and remaining in control after a fast tack on a short board is completed. It’s the stance to insure our success in light winds: When we need to make it out to a wind line or just get back to the beach should the winds ever just shut off ( We’ve all been there). It’s the body position we take up the moment we are on the board for the first time after a waterstart in order that we don’t get launched over the front in high winds or fall off backwards in light winds. It’s also useful in light wind wavesailing for slogging and for hovering on the spot while waiting for a desired wave to catch up.

Rescue Stance is used at any moment in the game where we’re are out of the harness and foot straps. Sometimes during a complex freestyle moves, jibes, tacks or simply used to launch off a tricky beach like Ho’okipa where the winds are light, gusty and off shore with a pounding shore break. Rescue Stance is the act of controlling the power of the wind in your sail by counteracting it’s force with the weight of your body. It’s the act of hanging from the boom to load up mast foot pressure rather than pulling in with your arms and killing it. I call it ‘Rescue Stance’ as it pretty much saves all your intended windsurfing goals and moves- And it literally enables you to get back to the beach if your ‘reliable’ wind shuts down completely to just a puff and a prayer.  Using this stance at the end of a jibe or a fast tack is the equivalent to the perfect two foot landing of gymnast after a complicated double twist in the air.

Simply put:

Drop + Hang + Front Foot next to Mast Foot + Look Upwind = Mast Foot Pressure + Stability
Stand up + Yank sail in with arms + Feet close together + Look Down =  No Mast Foot Pressure = The ‘Funky Chicken Dance’ before falling in.

How and Why:

We lose mast foot press whenever we stand up and pull in with our arms. We lose stability when we look down and when our feet are too close together. The front foot should step up to the mast foot (Especially on smaller boards). No muscles in anyones arms have enough power in them to counteract the constant ever changing force of wind. Any time a gust pulls the sail out of your grip you instantly lose mast foot pressure-  Mast Foot Pressure (MFP): The force of your body weight channeling via your boom into the mast to keep the nose of the board down. Without MFP your body sinks the tail of the board. When we sink the back of the board the nose usually flies up into wind.

What, Where and When

We use the Rescue Stance during:
Jibes:

It’s the piece of the puzzle at the end of the jibe that allows us to plane out of our jibes as fast as we went in without getting our hair wet. It’s used at two very specific times during the planing or non planing jibe.

a) Just after we have stepped up to the mast foot and are beginning to let go of our sail to let it flip.

DO

DON’T- pull in on the arms and stand up!

b) When we are catching our sails on the new side just after it has flipped. Our front foot is next to the mast foot, our weight is low, feet wide apart, front foot pushing the nose of the board down wind. Just hanging from the boom-

DO

DON’T pull in with your arms! Kills MPF- How frustrating is it to cruise through a jibe and then fling yourself off just at the end with a hard yank on the back hand?

Tacks:

Rescue stance is used at the end of the tack when we have already jumped around the front of the board to the new side. Hopefully our front foot is near the mast foot. We are hanging, guiding the board off the wind with the ball of our front foot while pulling the back of the board with our back foot. Hang and look upwind until you are sailing away comfortably in the new direction.

DO

DON’T pull hard with the back hand. Kills MFP.

Water Starts:

There is nothing that brings us closer to tears than swimming all our equipment around, getting our board and sail lined up correctly to the wind and finally getting enough wind to pick us up out of the water and thinking ‘YES’ as we get up on the board… Only for us to stand too upright, pull the sail in with our arms (killing MFP), sinking the back of the board and falling right back in! In a high wind situations the yank of the back hand would fling us over the front of the sail.

Let’s give all your efforts the chance of a successful waterstart. Once the sail has picked us up, let’s make sure your front foot makes it all the way up to the mast foot. Don’t pull in with your arms, just hang and look upwind until we have found our stability- Then adjust your stance accordingly. Ie: Stay low in high winds and sail a little more upright in lighter winds.

DO

DO

DON’T

Beach Starts:

Always leave the beach with back foot in correct position on the center line between the front and back footstraps and the front foot steps all the way up to the mast foot. Hang until you have gauged the wind directions and strengths correctly and change stance accordingly. Ie: Drop weight more in higher winds and stand up more in lighter winds. Look upwind for general wind awareness. Light wind take off’s are more difficult than high wind. Must never pull the sail in with your arms!!!!

The key to extremely light wind take offs from the beach is to step up with your front foot slightly ahead of the mast foot on the nose side of the board and the back foot goes slightly more forward too- Readjust footwork when you reach the wind line or if the wind picks up.

DO

DON’T

Slogging and Hovering:

Hovering might be my favorite light wind thing. I love looking behind me and watching my chosen wave get closer to me as I push the back of my board so up wind that I stay in a stalled position long enough for the wave to catch up with me. I adjust my foot presses minutely. Like the feeling of balancing a nonmoving bike. Front foot in front of mast foot- adjusting pressure of each foot slightly and constantly. Keep sail upright and away from you.

When When slogging in super light winds on a short board. Front foot must go up to the mast foot.  (Front foot goes in front of mast foot on the nose side of the board in crazy light winds.) Look upwind for balance and wind awareness. Keep the sail away from you. Hang if you need to- Chill out hard. Zen into a meditative headspace and enjoy the world moving by at a slower pace. You will eventually hit the wind line or reach the shore.

DO

DON’T

Have fun on the water and enjoy the process.

ALOHA

August 9, 2011Comments are off for this post.

‘Tis the Season for Teaching

The Grey Areas of Teaching Windsurfing

Summer of wind is the trend every year. Waves shrink down to a manageable Ho’okipa two foot while most of the other venues are pretty much flat. Fantastic conditions to learn how to windsurf, to jibe, waterstart and taste Ho’okipa’s waves when they are as docile as a purring kitten.  All this teaching and learning makes me ponder the grey areas of windsurf instruction.The questionable right and wrong ways of doing things….

One of my students the other day said she thought,

…it was great to learn different things from different instructors. I don’t think any coach or instructor should think their way is the only way!"

…and I would have to say, I agree with her.

This got me thinking a lot about the gospel of windsurf coaching… Every year different instructors declare themselves to be the ultimate gurus of teaching windsurfing. The all knowing ones who change their absolutes with the ebb and flow of windsurfing fads. I personally don’t believe in absolutes and feel there is always wiggle room on the teaching/learning curve. If there wasn’t how would the newer styles come about if no one broke the ‘rules’ such as for example the trend towards super long harness lines, floaty quads and even smaller sails. If it was so, then Kauli had no idea what he was doing and would have been wrong in the eyes of those same ‘Gurus’.

Though I teach I’ve never stopped being a student.. Actually Matt Pritchard and I always say to our windsurfing guests there are nine ways to skin a cat depending on personal style, comfort and conditions as well as your choice of windsurfing disciplines will affect those variables. Matt taught himself how to sail as a child so sometimes he uses techniques that might not be applicable to teaching. We may teach things differently than we actually sail, ( underhand verses overhand grip bla blah blah…) simply because it is easier to learn the technique the way we teach it first…. Later on you can do whatever you want.  For example once you know how to ride a bike, riding without using your arm is totally possible and even relaxing but you’d never teach someone how to ride a bicycle without holding on to the handle bars. Everything in good time.

Looking back on my early years of learning to windsurf, my teacher at the time declared that my harness lines should be no longer than my wrist to my elbow, my boom should hover somewhere around my eye balls and insisted I sailed powered up way beyond the realms of control putting me on 5.0 when perhaps a 4.0 would have been enough. But those were the times and going super fast was cool and the absolute. Were they right or wrong? I don’t know. It was right for that head space of the 90’s windsurfing scene.   Ideas change, equipment changes, fads change…  A few year later while I was sailing in Ireland, Nik Baker came up to me and said my boom was way too high and my harness line were way too short….  Being a good disciple, I looked at Nik like he was a complete idiot because the Guru had spoken to me and I believed in his gospel absolutely… If I’d just listened to Nik I would have found comfort much earlier with a whole lot less catapults. Another reason I think it is prudent to respect and listen to as many different ‘experts’ until you find what works for your personal, shape, style, strength and interest.

Teaching often reflects personal style as well. There are all sorts of quick fix programs people teach to speed up certain levels of windsurfing which I personally don’t like to promote.  Some instructors teach keeping the boom low so it rest on the back of the board to help with water starts.  This is not wrong and it does help people get the sail out of the water… But it may also mean once you are up and sailing that the boom is too low so you are not able to sink into the harness properly for correct stance, which in itself creates a whole slew of new problems.

There’s also a trend is places like Maui or Baja to teach water starts without teaching beach starts which is great for places where the wind fills into the beach and where the depth of the water drops off immediately from the shore line.  Unfortunately when those people come to a venue where they need to slog out to a wind line or want to try sailing a place like Ho’okipa where it is a super shallow, challenging beach break with fluky winds they can’t go out because they’ve skipped a basic technique to try and jump to the next level. So I personally believing in teaching the fundamentals properly. Some of these techniques might take longer to learn to do them right in the beginning but later down the road the sailor won’t get stuck at a certain level.

I think that learning to fly the sail by picking it out of the water at the tip rather than using the floatation of the board will allow the student to continue on the path of learning faster and faster water starts, thus allowing them to  go out in more challenging conditions like waves where taking twenty five minutes to swim their kit around and drag their boom over the back of the board is no longer a good option. I think taking the time to learn the basics well in a consistent windy place is the key to more windsurfing doors being open to students in the future.

There’s nothing wrong with taking a week long holiday just learn to do just one thing right. My tip is to only try something new 5 times in a row… Then go back to doing something that you can already do and brings you pleasure. Then try again only giving yourself five attempts again then go back to something you enjoy. At first you will only get 0 out of 5 attempts. Eventually you’ll notice you’ll get 2 out of 5 attempts until you are successful 5 out of 5 times. This will work for some and not others. For me when I’m trying to learn something new it keeps me focused, It keeps frustration down and stops me from attempting new things when I’m tired and at risk of injury.
Different physical action can create the same result…. Whether you’re twisted forward or squared on to your sail as long as you are sheeting in using your harness it’s all good in the hood. Since I’m most interested in waves and teach on Maui, I teach a stance that is most useful for these sailing conditions and getting upwind. I call it the Twist. It’s a stance where you twist you’re upper body forward to help keep the sail in a balance position which allows you to look around more upwind to see what the wind is doing, spot waves and generally be more aware of other windsurfers around you, etc.. The key is that you are sheeting in using the harness and not trying to muscle the sail with your arms.

Racers on the other hand, who are windsurfing barely on the edge of control, sail more square on to their sail to help handle the power in their sails.  Phil McGain came to one of my clinics and demoed to my group his high wind sailing techniques for those who wanted to see his racing stance. More than anything he explained to the group, is that his extremely long harness lines allow him to get ridiculously low. He sailed with both knees completely bent with his upper body curled up like a turtle and his bum just skimmed the surface of the sea. He wins many races like this and it obviously works for him.

I personally don’t race and it hurts my back just looking at Phil’s stance. But I know it works. For wavesailing or plain old freeride I choose a more upright stance but I’m not sailing ridiculously big sails in high winds so I don’t have to sail like that. Sailing at Ho’okpa late last night, Fransisco Goya and I were one of the only ones out and I purposely checked out his sailing stance… His upper body was twisted so far forward… Even more extreme than mine. It reminded me of an owl’s head cocked backwards and it looked nothing like Phil’s stance. Though in all cases we are all committed 100% to our harness and using our weight and not our arms to keep sheeted in whatever our personal stance styles.

Some people need different tips to succeed at different levels. I was teaching a guy for a week who was 6.2″, sailed fast but out of control. He barely looked up, the sail dropped to the back of the board, and he was sheeting out every time a gust hit him because he was using his arms rather then sinking into the harness. By twisting his upper body forward he stopped dropping the sail back, looking upwind helped him concentrate more on where he was going and to read the winds on the water rather than tensing up when going at speed, etc.. Sometimes I have to exaggerate what I teach in order for our students to find the sweet spot on their own.

And thus I reiterate what I mean by… ‘Different strokes for different folks’. I’d always be wary of anyone who declares it’s their way or the highway style of teaching. Being open minded and trying out different techniques by different instructors will only open your horizons and probably lead you down the path to your own personal comfort and style in what ever windsurfing discipline you eventually get hooked on.

May 1, 2011Comments are off for this post.

The Low Down on Getting Low

How long should you go and what it looks like

Staying low and hanging off the boom when not using the harness in certain situations is the key to many successful maneuvers while windsurfing; such as getting going after beachstarting without sinking the tail and falling off backwards, getting up from a waterstart without getting pulled over the front or rounding up, successfully getting around a jibe or a bottom turn on a waves without stalling out or losing control . Getting low is the only way to handle a powered up sail when not using the harness, without letting out the back hand (sheeting out), losing mast foot pressure, and/or getting catapulted over the ‘handle bars’!

Getting low means hanging off the boom with straight arms as though you were a monkey swinging form limb to limb. Basically you want to hang without using a stitch of upper body strength by using the full weight of your body to counteract the power in the sail to keep sheeted in and remain in control. Your weight should fall back over the back leg while the front leg remains straight with some give in it to handle chop.

Getting low does not mean leaning back so you fall off backwards all the time. Your weight is down over the board, not the water and how low you go depends on how much power there is in your sail.

ABOVE PHOTOS: The photos show you what I mean by getting low. NOTICE: Where am I looking? How low under the boom am I? Are my arms strained or relaxed? Am I hanging off the boom? Is my weight over the back foot or the front foot?

Ideally your head should be looking up wind watching out for gusts or lulls….


Why get so low?

We want to use our weight rather than the strength of our arms to counteract the power of the wind in the sail and keep the nose of the board down with mast foot pressure (the result of your weight transferring from the boom putting pressure down through the mast so you don’t sink the back of the board).

Using your arms rather than your weight is futile… It’s the equivalent of doing pull ups rather than just saving energy and hanging … I can hang from a bar all day long.
Below are some of the problem you may have encountered by not getting low enough in certain situations.

  • Falling off backwards when you first get up on a windsurfer by sinking the back of the board.
  • Losing speed
  • Catapults
  • Spin outs
  • Slogging
When to get low

If the winds are moderate to high it is ideal to get low as soon as you jump on your windsurfer so you don’t get catapulted  a mere five feet from shore.

Hanging low also keeps the nose of the board down via mast foot pressure so you don’t sink the back of board and fall of backwards the moment your feet touch the board. Get on your windsurfer and stay low until you are comfortable and stable while sailing away. You can eventually ease to a more upright position if the wind calls for it…. But who knows you might have to get lower if a gust is racing in your direction!


Staying low when you first get up insures you don’t just get blown over the front again. Waterstarts take time to learn on a good day, but there is nothing more frustrating than swimming all the gear around, getting the angles to the wind correct, pulling the sail out of the water and finally getting up on to the board only to be pulled right over the front by a gust. It’s exhausting and can reduce a grown man to tears to have to start the whole process again! Stay low over the board once you’re up! Not too much that you fall off backwards…. Though falling off backward is better than the latter, at least you fall back into waterstart position. Just imagine how powered up your sail has to be to lift you out of the water and if you don’t stay low you’ll be over the front before you know it. Once you’re up and stable it also helps to head up wind to de-power the sail.


It is best to head out on the broadest reach possible to get planing quickly. In doing so, the sail gets super powered up which means you are going to have to get aggressively low and/or sink down into the harness to get speed and keep sheeted in order not to do ‘bull riding impressions’, which as we all know ends with a graceless dismount. When you start using your arms and not your weight, gust of wind easily pull the sail out your back hand (loss of mast foot pressure) which lifts the nose out of the water and you lose control.


Staying low through out the jibe is one of the keys to getting around in full control. The lower you are the better your balance. Low mean maintaining the pressure down through the mast so the board sticks in the water through out the turn when not in the harness. It’s especially crucial to keep your weight down while flipping the sail as there’s an extra pull of power in the sail at that time. It also really helps to look back upwind while flipping the sail to bring the sail forward and into the sweet spot of balance rather than letting it drop behind you.

Tips for a Planing Gybe


When you’re riding waves the bottom turn is something like going into a jibe but just before you would be flipping the sail, you cut back at the top of the wave instead. To ride waves you unhook but your feet remain in the footstraps. As you can imagine when you’re unhooked heading in the same direction as the wind, along a wave, there’s going to me a lot of speed, and power  in your sail. Getting low with our back hand way down the boom will be the only way to handle all the power in the sail! You don’t want to be spinning out on a wave ( which is caused by the nose lifting up due to a lack of mast foot pressure and air getting caught around the fins) and/or slow down as the board sinks and slugs through a turn.

Enjoy getting out there and GETTING DOWN!

Aloha,

April 30, 2011Comments are off for this post.

Flow and Rhythm with the Wind Using a Harness

Rarely have I sailed a venue where the wind is truly steady. The majority of my experiences wind is a fluctuating force. Which is why it’s really important to learn to flow with the gust and lulls and use your harness and weight correctly to dance in rhythm with the conditions rather then join the windsurfing rodeo show. Similar to horseback riding if you’re not in sync you’ll get bounced all about with a potential of an unseemly dismount. The key to perfect rhythm is anticipating what the wind is going to do. The only way to know what’s coming your way is to start reading the wind before it hits you. Keep a steady eye upwind to see what your wind partners next step is going to be… Steady, a gasping lull or a heaving gust?

Next start preparing your stance for the change in wind force if there is one… For lulls lift your hips (weight) up towards the nose of the board to get in a more upright position and with a gust drop your hips (weight) down over the back leg without using your arms a stitch to control the sudden power in your sail. If you’re too upright when a gust hits you, you’ll be over the horns so to speak or you’ll sheet out (even if it’s just for a second, it’ll pop the nose of the board up as all your body weight weighs down the back of the board), swerve and/or spin out as air gets caught around the fin hence the ‘Bucking Bronco’ experience. It’s much more enjoyable and a safer ride if we learn how to tango correctly with the wind before we hit the liquid dance floor!

Lighter Winds

In lighter winds your stance looks more like the shape of a 7 as you’re more upright.

In high winds your stance looks more like the shape of a 6 as you crunch to sheet in with your harness. Not your arms!

The only way to know what’s coming your way is to start reading the wind before it hits you. Keep a steady eye upwind to see what your wind partners next step is going to be…

The photos below are examples to show you how the hips move when you’re hooked in shown without a sail so yo can really see the movement of the hips from up and towards the nose of the board in light winds and down back over the back foot in high winds. The arms only bend because you’re using your hips to to crunch in which means your head gets closer to the boom. As a by product the arms need to bend in order to accommodate that action, but you are NOT using your arms to hold the power in the sail. Your hips and legs should be doing all the hard work!

Light wind ‘offering it’, hips up.

High wind ‘sitting on it’, hips down.

---------------------------------------------------------

Light Winds and Managing Lulls

Hips up (with our bellybutton facing towards the nose of the board) while you shift your weight towards the front leg in effort to bring your sail in a more upright powerful positions which will enable you to sail without stalling through a lull. Lifting you hips up lifts the sail up.

Light Wind Sailing Stance

p.s. if you add more twist you head upwind!

High Wind Sailing and Managing Gusts

Weight drops down over the back leg and into the harness. Hips are facing forward (bellybutton points towards the nose of the board as much as possible). Head is looking where you are going even a bit upwind as it slows down the sensation of speed ( just like keeping your eyes on the road while cycling keeps you balanced rather then looking sideways or down). It also ensures a comfortable and in control ride. As you sheet in the sail via your harness you have to do a crunch like maneuver by pulling in with our stomach muscles which nears your head to the boom and bends your arms… Though the arms are not being using to hold the power in the sail. You should be harnessing that power through the harness via your hips and legs. Your thighs should burn from the effort! When you become an expert at high wind sailing you should be able to readjust your bathing suit bottoms with your back hand while you’re doing ‘mach four’ across the seas.


High Wind Sailing Stance
Neutral Sailing Stance

When you are perfectly powered up you are in a neutral position with weight centered over both legs evenly. Not too up nor down. Though you should always be facing forward eyes scouting upwind conditions in anticipation of wind fluctuations. I don’t think I’ve ever stayed in a neutral sailing position for long…. probably only in passing on my way to getting lower or lifting my hips sky high.

Lot’s a warm Hawaiian breezes,

Aloha

February 1, 2011Comments are off for this post.

Basic Windsurfing Stance

Hip Action

If there is one tip out there that could greatly improve your sailing by as much as 50 percent it would be what I call the Hip Twist. If you are not looking around you probably don’t know what’s going on and are complexly unaware of your surroundings. You will be less in tune with the fluctuations of the wind and you may find yourself being catapulted or simply coming off the plane a lot. This is exasperated if your front knee is bent and you are looking at your hands, feet or just ahead of the nose of the board. This kind of stance feels uncomfortable or out of control. A slight hip twist with your bellybutton pointing slightly more towards the nose of the board will open up you viewing range as long as you are sheeting in with your harness and not your arms. This allows you to see more clearly upwind in order to read the wind strengths before they sneak up on you!

Perfect stance is the good posture of windsurfing. This standing position on your board with your hips facing slightly forward is ideal for the absolute beginner as it will allow them to fly faster through the tough learning curves of windsurfing with the correct tools. Improvers will find that the Hip Twist stance will make it that much easier to get in and out of the footstraps and harness while expert sailors will suddenly find sailing insanely over powered and getting upwind to catch those waves a cinch. The Twist is quite simple… Though perhaps like yoga it will take some time to hold the position if your flexibility and muscles need practice.

This stance is the most effective way to sail in control while being more aware of what’s going on around you, to sail slow and not end up miles down the beach. It’s your key to sailing and keeping balanced with the ever fluctuating wind without getting pulled over every time a gust or a lull hits you. Speed actually feels as though it slows down. You’ll be sheeting in correctly without even noticing it which makes for a less bumpy ride since when the sail pulls even slightly out of your hands or harness all the weight goes back on your feet and your board starts to buck like a wild horse and most likely ends in a catapult.

Finally incorporating this stance is absolutely the only way you’re ever going to get upwind making any effective ground. To achieve this stance you’ll need to twist your upper body slightly forward and towards the nose of your board.

The Twist is not useful for initiating the turn of the jibe, the bottom turn on a wave or for any other reason you might want to fly off down wind.

Position of Feet

To ease us into the twist of this stance we’ll start off with the feet. Front foot points toward the nose of the board in all positions!

Light Winds Out of the Footstraps

Feet further forwards toward mast track:

When sailing upwind in light winds the front foot moves more toward the outer edge and windward side of the board as well.

High Winds Out of the Footstraps

Feet further back down the board:

Planing in the Footstraps: Front Foot still points towards the nose of the board as much as possible.

The front foot points as much as possible towards the nose of the board whether your in the footstraps or not. Back foot remains across the board as the photos show above. If your front foot is not pointing forwards towards the nose of the board you will not be able to twist your hips forward. Experiment and you’ll see what I mean. Try twisting your hips forward towards the nose of your board with both feet facing across the board like the photo below. I bet you won’t be able to twist. Now try twisting you hips forward with your front foot facing forward like the pictures above. It’s much easier isn’t it? Again whether in the footstraps or not the position of your feet are the most important component for achieving the proper twist in order to have a pro windsurfer like sailing stance.

Less Effective Footwork

Twisting the upper body forward becomes almost impossible with the front foot position below! Better to point the front foot a little more forward towards the nose of our board by bringing your front foot heel inboard as much as possible.


The Hips

Simply twist your hips slightly forward and attempt to point your belly button towards the nose of the board as much as possible whether you’re in the footstraps and harness or not. When you’re fully committed to the harness the twist will be very helpful with keeping the sail balanced and sheeted in along with some commitment to the harness and some ‘hips up and down action’ to counteract the strength of the wind. High and light wind sailing is another article.

Belly button slightly toward the nose of the board:

A moderate hip twist action using no footstraps or harness:

… a harness only ‘Twist’:

The Hip Twist in the footstraps and harness:

…and to the extreme for going upwind.

When you twist to the extreme while planing in the footstraps and harness you’ll head upwind without a bother as long as you’ve got some pressure on the back foot as well. Just make sure you don’t head too much upwind as that will make you stall the board!


The Hips

The head should be looking into wind or just upwind from the nose of the board. Firstly the body follows the direction the head is looking starting with the shoulders. If you look way upwind you’ll head upwind, adversely if you look down you’re going to probably fall down! Looking through your sail is only good when you want to initiate the turn of a jibe or a bottom turn on a wave. Secondly looking upwind while you’re sailing is crucial for reading the ripples on the water so you know what strength o f wind is coming your direction in order to adjust you stance accordingly. Should you see a lull you’ll want to start lifting your weight up and towards the nose of the board and if you see a gust you’ll want to start sinking down over the back leg and into the harness in order to manage the gust so you don’t get pulled over. Even if you are completely incapable of reading the strength of the wind racing along the water towards you, by looking in the right direction upwind you will eventually start to connect the style of ripples on the water blowing towards you with the strength or lack of wind that hits you. Thus getting into the habit of looking upwind while you’re sailing will greatly improve your chances of not falling off your board due to fluctuating winds as you’ll be anticipating what’s coming your way.


Looking upwind in search of gusts on a reach to get going.

Head position while sailing in a straight line- Note the direction I’m looking while on a broad reach… Still upwind from the nose of the board but now by torso is more squared with the sail. This only because I’d heading straight downwind to get going on purpose. As soon as I get planing I will head upwind again.

Windsurfing with shoulders squared to the sail and looking mostly through the sail while sailing across the wind or upwind is the equivalent of driving a car and looking through the side windows. It makes the feeling of speed feel a lot faster and out of control, the opposite of relaxed. You want to be relaxed while sailing!


The DOs and DON'Ts of Windsurfing Stance

Sailing while not using the footstraps or harness…

DO:


DON'T:

Sailing while just using the harness.


DO:


DON'T:

Sailing while in the footstraps and harness.


DO:


DON'T:

Try and look at all the DOs and DON’Ts photos and see what’s going on in the photo. For example: What are the positions of the feet, hips, shoulders and head. Hope this helps improve your stance for now. Next I’ll be covering The Low Down on Getting Low.
 
Happy sailing,